Showing posts with label Tags. Show all posts

Saturday, December 27, 2025

Holiday Gift Tags

Only needed a few gift tags at the last minute for my holiday gift baskets this year so I pulled out my Karen Burniston Poinsettia dies to embellish tags. Flower petals were cut from red foil board and glitter cardstock. I used green foil board for the leaves.  Pearlescent and glitter gold cardstock was used for the flower centers. The tags were cut using Lawn Fawn Stitched Circle Tags die from red cardstock. Spellbinders Circle Nestabilities dies were used to cut the white inner circle.

I made bag tags again this year to help me identify and deliver the correct bags of gifts to the correct families. 

Last year I used paper clips to attach the tags to the bags but I found they slipped off the bags too easily so this year I used ribbon to snuggly tie the tags onto the handles of the bag where they could easily be spotted and read. This year I used a different Doodlebug polar bear print and cut image, adding the family name to each prior to cutting and small holes at the neck to thread the ribbon through. This worked out very well with no errors in gift deliveries again this year. Will definitely continue making these tags every Christmas.


Sunday, December 22, 2024

Christmas Tags and Things

Found the cutest polar bear Christmas wrapping paper at Hallmark this year and wanted to make matching gift tags.


I used Lawn Fawn's Stitched Circle Tags to cut silver foil board for the base and Spellbinders  nestabilities dies to cut the circles from blue dotted cardstock. Polar bears were cut and paper pieced using Eline's Collectables Arctic Bear die set.

At the last minute I needed a few gift card holders to include with some gift baskets. These simple top fold cards with pockets inside for gift cards came together quickly. I decorated the fronts with different sized die cut snowflakes from MFT DieNamics "Let It Snowflake" die and flatback rhinestones.

This little polar bear tag was the answer to the problem I have every Christmas of figuring out which bag of presents goes to which family. After having delivered the wrong bag of gifts to a friend last year, I knew something had to be done.
I added the family names to  cute a print and cut images of a Doodlebug polar bear from the Lori Whitlock Shop. Before cutting, I also added a small slit, just large enough for a paper clip to fit to the cut file.

This way, I was able to clip the polar bears to their correct bags before loading them into my car. Sitting on the edge of the bags these polar bears labeled with names are easy to see and no more worries of delivering the wrong bag to the the wrong family.

Sunday, July 25, 2021

Christmas In July Gift Tags

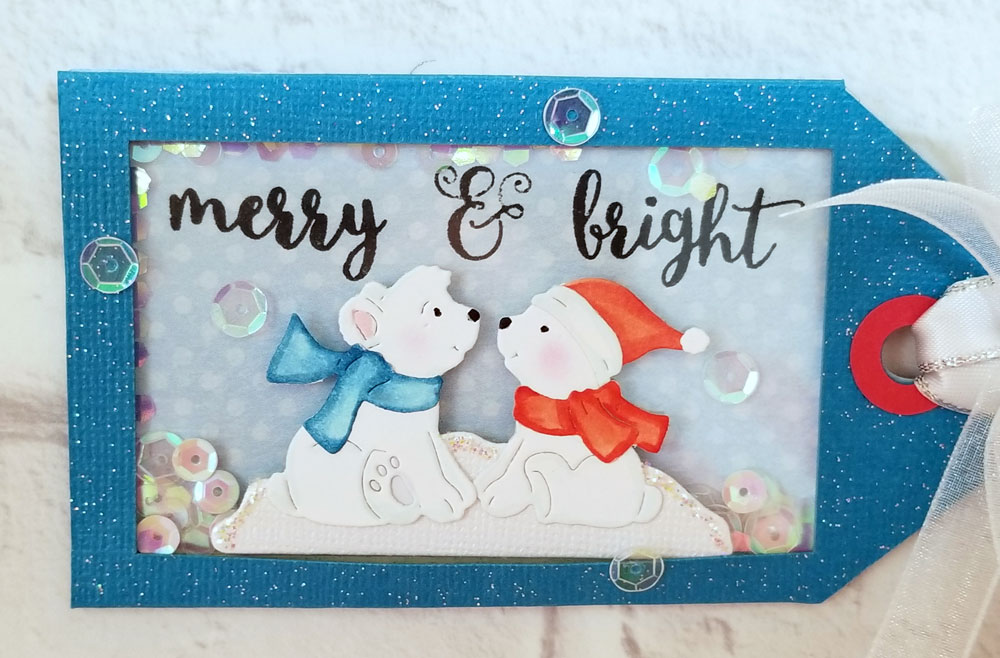
After feeling so much satisfaction from making Christmas tags in July for the first time last year, I convinced myself to give it a try again this July. I used the same tag svg cutting file I had created for my Christmas shaker tags last year but changed the colors and the image.

I chose to use nontraditional Christmas colors that are actually a better match for my blue foil holiday wrapping paper this year. Couldn't find any cute Christmassy stamps in my stash to use on my tags, so I decided to use this pair of die cut polar bears from Cottage Cutz' "Polar Bears with Birch Trees" instead. Inside the shaker I added iridescent clear and white sequins together with Recollections "Glitz" chunky glitter.

Polar bears and their hat and scarves were cut from plain white cardstock and quickly colored with Copic pens. Love that after coloring the scarves and hats, all that was needed was  a few quick strokes with the lightest shades of grey, pink and blue to add shadows and highlights to the bears. I die cut the bit of snow they're sitting on from textured pearlescent cardstock and added some Stickles for some contrast so the bears wouldn't disappear in the snow.

Instead of my usual computer generated sentiments, I stamped the words on my tags this year, using a mix of stamps from Kwellam's "Christmas Wishes", Waffle Flower's "Classic Sentiments" and Scrappers Den's "Christmas 1" sets. It took me a few days to put together a dozen of these, and the feeling of accomplishment afterwards was so satisfying! I even went as far as planning the layout for our family Christmas cards and ordering the photos that will be included in them already. Wow! Hopefully my unprecedented early start on Christmas projects will make the holidays a lot less stressful this year.


Saturday, October 31, 2020

Have a SAFE Halloween!

Here's the card I created to send to our granddaughter for Halloween this year. Can you guess who she chose to dress up as? 
Just like so many little girls her age, she wanted to be Elsa from Disney's Frozen movie. Our daughter sent us a few pre-Halloween sneak peek photos of our granddaugther trying out her new costume, and it was so heartwarming to see the joy in her face as she modeled Elsa's glittery gown. I knew right away that I wanted to make an Elsa Halloween card!

I used a coloring book image of Elsa to render into a cutting file using Make the Cut design program and added a paper pieced jack-o-lantern from Miss Kate's Cuttables placed in front. I used glitter and pearlescent cardstocks flatback rhinestones and Stickles to give Elsa lots of sparkle (because that's what little girls --and me-- love, right?).

I put Elsa behind a clear acetate card front, and used Karen Burniston's Rockin' Rectangle mechanism to animate the card. I attached my sentiments to the front and inside of the acetate panel as a print and cut using Christie ttf and a fancy label cutting file.

As the card is opened, Elsa moves forward and little Olaf appears from behind! 

And finally, I used the back of the card to add our Halloween wishes for our granddaughter. 

I also made a second batch of cookies but with not enough time to spend making anymore treat boxes,  I simply packed them in cute Halloween cello bags tied with satin ribbons and added a fun tag.
 
My original plan was to make paper pieced tags, but after spending much time creating a cutting file for my design, I realized I would be cutting and piecing 6 layers of cardstock to create each tag. Yikes! I quickly had a change of heart and decided to switch it over to a print and cut file by stacking each of the layers in the correct order on the design screen. I thought printed image on the tags were cute enough, and it was much quicker to put together!

Before I go, I'm excited to share a  couple sweet and spooky cute treat boxes I received from my crafty buddies, Kris and Lorna. Kris put together this adorable Dracula and coffin treat boxes filled with yummy candies and antibacterial gel!

And how about Lorna's amazing Halloween rendition of children storybook characters from"Where the Wild Things Are" for this fun treat box! 

Thank you for stopping by! Please have a SAFE and Happy Halloween!

Sunday, August 2, 2020

Christmas Shaker Tags in July


I admit I've never been much of a fan of  the concept of "Christmas in July". I suppose getting an early start on holiday projects is always a good idea, but I'm never ready for it and the thought of already being late for the holidays in July gives me anxiety! 
But last week while tidying my craftroom, I came across this very old Penny Black rubber stamp purchased many years ago but never used... and thought to myself, "Okay, why not? Let's give it a go!"

    
I started by coloring my stamped image with Copic markers, then scanning it and using the print and cut feature in Make the Cut design program to fussy cut a dozen images. Cutting file for the shaker tag front was created by adding a rectangular shape into a simple tag shape. Back panel was also done as a print and cut using Invitation true type font.
I used clear acetate for my shaker window and adhered the stamped image to the front.  I applied 1/4 inch wide foam tape on the inside around the window and lightly wiped the acetate with a Bounce dryer sheet before adding my chunky glitter and sequins. Sounds crazy but that really helped to control the issue of static cling...uncontrollable glitter and sequins everywhere that I dislike most about making shaker tags. I also found that I could keep the glitter and sequins from sticking to my fingers and tweezers by wiping them with the dryer sheet too.
Now that I've finished my first set of a dozen Christmas tags, it feels so good! I guess Christmas in July can be a good thing afterall.

Tuesday, January 7, 2020

Scurrying In With the Year of the Rat


Happy, Happy New Year! I'm finally back after taking some time off during the holidays. We're celebrating the Year of the Rat on the lunar calendar in 2020, so these are the tags I made to dress up the boxes of snack mix I passed out to our guests at our annual New Years family reunion.

I put together my paper pieced rat by creating a cutting file for it using a coloring book image, and added a shadow layer cut from gold metallic foil board. Tag shape was die cut using Lawn Fawn's Stitched Circle Tags die from Stardream gold cardstock. I used a Spellbinders Nested Circle die for the back panel and ran it through Cuttlebug's Plum Blossom embossing folder from their Asian Bundle to add some texture. I also added the kanji character for "ko" or "child" cut on the Silhouette, which signifies the Year of the Rat as the first animal of the 12 year lunar cycle.

On the backside of the tag, I used the print and cut feature in Make the Cut design program to add our New Years greeting.
Stay tuned for more Year of the Rat projects that I'm still hurrying to get done! Chinese New Years is early this year so bear with me as I may be a little delinquent with my blog posts. Best wishes to all for a wonderful brand New Year!

Sunday, December 22, 2019

Tags, tags, tags!

 One of my favorite crafty things to create during the holidays is to make Christmas tags. I think it's because they're usually quick and easy to make and yet seem to add a personalized touch to our wrapped gifts. This year I made these fun polar bear tags to dress up the boxes of Chex snack mix we gave out to friends and family.

I used Elizabeth Craft's Polar Bear die together with Lawn Fawn's Stitched Tag and Reverse Scallop Circle Windows dies to cut all the pieces needed for this tag. Since I used a lot of white on white  I decided to run the reverse scallop circle thru Paper Studio's A2 Stripes embossing folder for some texture. Polar Bear was cut from Bazzill Bling cardstock, which has a slight shimmery texture so he wouldn't  completely disappear into the background. Hard to tell from the photos but I cut the tag base from red glitter cardstock to give the tags just a little bit of glitz.

The rest of our gifts got either a Santa or a reindeer tag.  Santa was paper pieced and die cut from Elizabeth Craft's Santa Claus die. Guess I went a little overboard with the bling on these tags! I used Bazzill Bling cardstock to die cut Santa's outfit and beard and placed him onto a red glitter background, which looks like it was just too much shimmer for my camera.

My reindeer tags were put together using a Naifumodo Craft stamped image, colored in with Copics and die cut with a coordinating die set. Just for fun I added Nuvo Crystal Drops to his eyes and nose.
I used the smaller sized Lawn Fawn tag and reverse scallop window dies for these tags and of course, blue glitter cardstock. Next up, the gift card holders...

Monday, March 25, 2019

Girls Night Out

Earlier this month, a group of us who were best friends during our teenage years in middle/high school got together for a Girls Night Out. Some of us hadn't seen each other for thirty years or more so it was an evening of reminiscing and fun.

I filled half a dozen take out boxes with some homemade Crispix party mix and dressed them up with a frou frou tulle bow and fun shaker tag to share with the girls.

I chose to use a digital stamp, "Back To School Party" from the Tiddly Inks collection... appropriately named, don't you think? Colored the image with Copics and fussy cut it to fit onto the 3 inch round tag. A little hard to see in the photos but the sentiment inside the tag reads "Friends since Hanabata Days"... (a  little Hawaiian Pidgin English slang referring to being friends from when we were very young). This was the first time I used adhesive backed craft foam sheets run through my Big Shot with Spellbinders Round Nestabilities dies to create shaker tags. Found this to be much easier than trying to piece together strips of foam tape!


Sunday, February 10, 2019

Happy New Year of the Boar

Please pardon me as I struggle to catch up on my New Year blog posts! I'll be sharing my New Years projects from January in this post so I can get back on schedule and hopefully share my Valentines Day projects later this week.

These are the Year of the Boar refrigerator magnet calendars I put together for sharing with family and friends this year.


I also made several of these New Year cards with a fan window cut out. A strip of washi paper was adhered to the inside of the card so it would peek thru the window.


Inside, I added a  kawaii paper pieced boar above the strip of washi paper. I was all set to mail out several of these cards together with calendars until I went to the post office and found out it was going to cost me $3.55 to mail each set! I bit the bullet and mailed about half of them, and then while I debated about  mailing the rest, a few days later the postage rates went up! Are you kidding me?!!!(Sorry, I just HAD to VENT!)


And finally, I put together these Year of the Boar tags for a little over a  dozen take out boxes filled with Chex Mix to pass out to family at our New Years Day family reunion.

"Akemashite Omedetou Gozaimasu!" 

Monday, December 24, 2018

Christmas Card and Gift Tags

The inspiration for our family holiday card this year came from this four sided Christmas card we received from a dear friend several years ago. I loved the simple elegance of her card and knew I would one day try to do something similar. When I saw Dreaming Tree's Holly Christmas card this year, I immediately knew I wanted to use it to do a four sided card.

What I didn't realize at that time is that the beautiful and intricate filigree cutfile would take way too long to cut. I ended up having to simplify the design drastically, and even then it took my poor Silhouette machine over 30 minutes to cut just 2 panels. I also found I had to allow the machine to rest between cuts or it would overheat and stall in the middle of a cut. That's when I decided to change our card into a three sided one instead.
Despite all the trauma associated with the cutting process, I was pretty happy with the final result. I used gold foil board on the base of the card to add our sentiment and added gold foil holly leaves and red glitter berries for accents.


I put together these penguin gift tags to gift our holiday chex mix to friends and family this year. The adorable penguin svg cutting file comes from Marjorie Ann Designs' Snowball Fight Penguins set.

Also did several of these quickie Peeking Santa Bear tags using a die by the same name from Cottage Cutz Designs.

Saturday, June 9, 2018

Monthly Baby Birthday Tags

This is a little project I started and committed myself to soon after our granddaughter was born last year. Being that she and her parents live many miles and an ocean away we don't get to spend much time with her and spoil her as much as we'd like to. So hubby and I decided we would send her a little package for each of her monthly birthdays for the first year of her life. To go along with each package, I made birthday tags to celebrate each month.

I kept the shape and size of all the tags are the same, but each was embellished differently. Sometimes I tried to correspond the tag theme with the season or a holiday for that particular month. I added a heart shaped label with the birthday month printed on each tag, and you may have noticed that the number of the month also coincides with the number of one of the embellishments on the tags. Two elephants for 2 months, three giraffes for 3 months and so on. LOL, notice as the month number increased, the embellishments had to get smaller and smaller so I could get them all to fit!

 It's so true what they say about babies growing up too fast! Especially during the first year of life, the number of changes babies  go through from month to month is pretty amazing. It seemed like every month there was something new little Evie had learned to do.

Thinking that these tags will probably be saved as baby keepsakes I took the time each month to pen a special personal message to our granddaughter on the backof the tags about the new things she had learned to do and how much she is loved and missed. I think this might be a neat thing for her later on in life when she is old enough to read them herself.