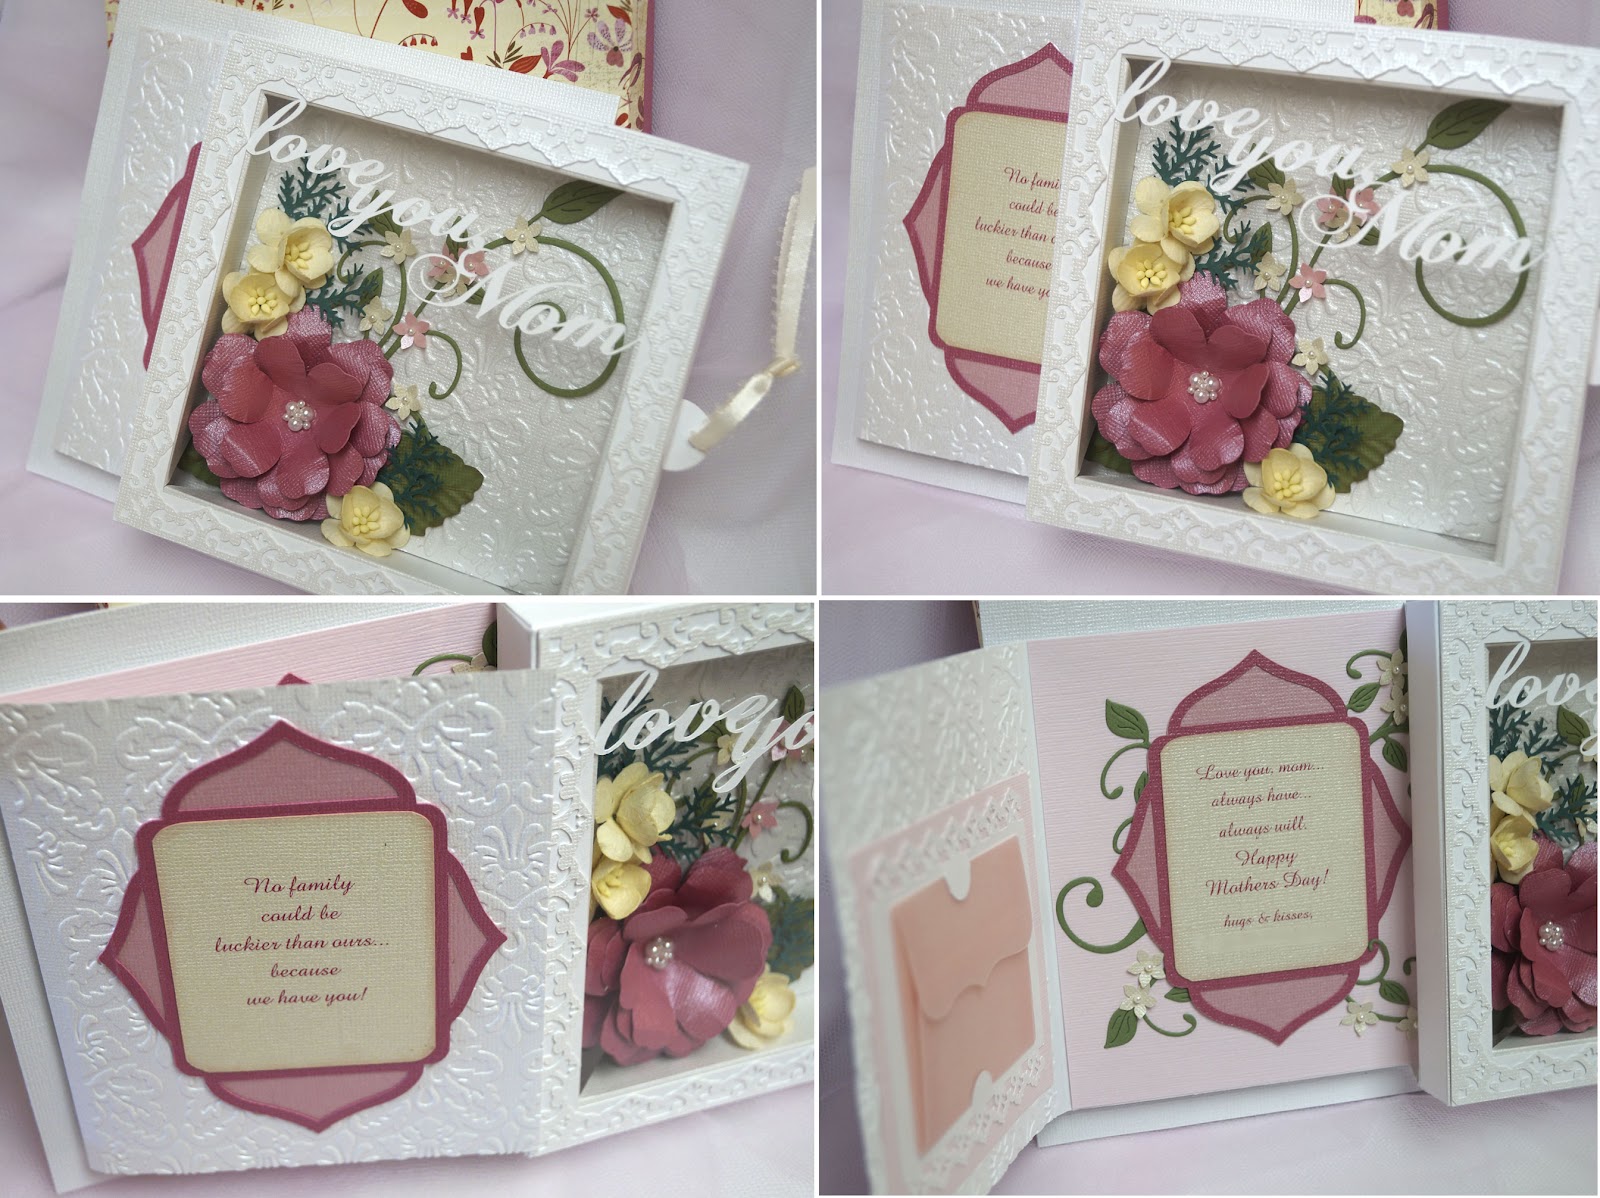
Taking another break from posting wedding stuff this week to share a few things I created for Mothers Day this year. Made two of these sliding shadow box cards for my mom and mil...
The original design for this was inspired by a tutorial by Lynn Mercurio over at Splitcoast Stampers for her
recessed window card. I fiddled with the measurements a bit to increase the depth on the inside to 3/4" so the flowers would fit, and covered the front with a sheet of acetate. Then I made and adhered a box bottom to the back so it would look like a shadowbox.
The petals for the large pink flower were cut from Cricut Mothers Day Bouquet cartridge, tiny blossoms were punched from a Carl Kikyo flower punch, and cream colored flowers are readymades from All Natural Accents. Leaves were punched from a large leaf punch and run through a crimper, tiny branches are from a Martha Stewart punch and leafy flourish is from Cheery Lynn's Fanciful Flourish die. Cuttlebug Jamara embossing folder was used for the textured back panel.
Both the sentiment (Chopin Script) and the lacy bordered frame were created in MTC, then glued on to the front of the acetate window.
Then to add some fun, I added the shadow box to the front of a slider card mechanism...pulling the ribboned tab on the side of the shadowbox makes it slide to the right, revealing a card with our Mothers Day greeting. I also added a little vellum envelope on the inside to hold a giftcard or monetary gift. You can find a tutorial for this very clever slider card from my best blogging friend Patti over at her blog,
Creations By Patti. Again, I did a few size adjustments so the slider would fit my shadowbox..
Next I made gift bags and decorated them for the mochi I planned to give to the moms at our Mothers Day dinner. Originally I bought plain white gift bags with the intention of decorating them, but realized later that they were too small. In desperation I ended up having to make my own using a large shoebox as a template and doubled layers of white wrapping paper with ribbon for the handles.
For the kokeshi dolls, I created a cutfile in MTC using a scanned image of a cute little kokeshi doll head notepad I recently picked up at a tradeshow. Then for the doll body, I used the adorable
Kyoto Cuties cutfile created and shared as a freebie by Jin on her blog at Under A Cherry Tree.
The branches were cut from Cricut Home Decor cartridge, and plum blossoms are the same file as on the kokeshi doll's head, sized smaller. I used truetype font Segoe Script and MTC to create the Happy Mothers Day sentiment and paper punched hearts for a simple border.
Now for the funnest part...I finally got my hands on some Action Wobbles....and just couldn't resist trying them out on the kokeshi doll heads. LOL, I thought it was cute how they reminded me of those bobble head dolls. So much fun!
And oooh....here's a peek at the tray of haupia (coconut custard), peanut butter, strawberry and chocolate filled mochi that I got from
Happy Hearts Mochi that went inside the bags... mmm... yummers! Happy Mothers Day!