Showing posts with label Blocks Card. Show all posts

Sunday, August 4, 2019

Totoro Baby Blocks Card

When our dear friend who had a Totoro themed baby shower a few months ago gave birth to her beautiful baby girl, I just couldn't resist following up with another Totoro card.

I used the same Totoro cutting files I created earlier for her shower card, but changed the orientation and colors (pink!) and placed the paper pieced Totoros onto a Block style card.


Times New Roman font was used to spell "B-A-B-Y" on the front and baby's name, "A-R-I-A-N-A" on the back of the card. Panels for the blocks were cut from white card stock and run through a Cuttlebug heart embossing folder for texture. Tiny flowers to embellish the alphas were cut using a Punch Bunch mini flower punch and I used Ivory Seashell Nuvo Crystal drops for the flower centers.

To the tops of the blocks, I added a few paper pieced icons related to the Totoro story (yes, I finally got to watch the movie!), a leaf, acorns and a dust ball.

The Blocks card easily fold flat for mailing and I added a sentiment to the bottom panel. There are several tutorials on this type of card online, I really liked this one by the Janie, the Craft Princess from Crafter's Castle blog because she explains the "mathematical formula" for the card template so you can enlarge or shrink the card size to your own personal preference.

Sunday, July 26, 2015

"Tsum Tsum"-ing by with Birthday Wishes


Do you Tsum Tsum? An intern at work introduced me to this adorable  mobile app game about a year ago, but I didn't start playing the game until recently. I still don't play it much, LOL, mostly because I don't understand the game...but it's fun to play just to see those adorable Tsum Tsums! Found out from my sister in law that you can even buy Tsum Tsum plushies at the Disney Store...apparently she has quite a collection of them herself!
That's when I decided I would try and make a Tsum Tsum themed card for her birthday.

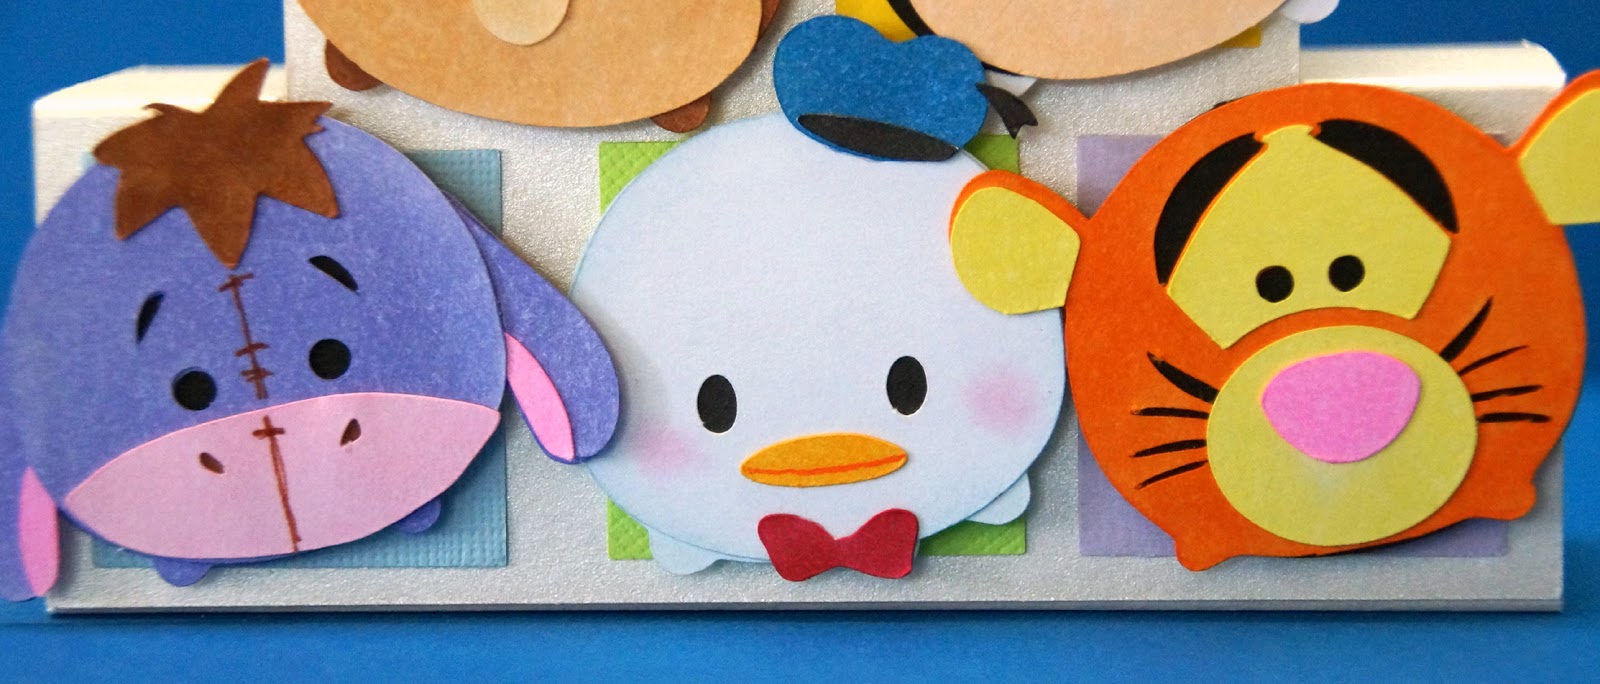
After some quick internet searching I learned that the name "Tsum Tsum" comes from the Japanese word "tsumu" which means "to stack". With that in mind, I thought a stack of Tsum Tsums on a block style card might be kinda cute. The original block style cards that I've been making till now has blocks stacked in a "L" shape. But since I wanted to do something a little more pyramid shaped, I altered the original block card a bit in Make the Cut (MTC) and came up with this shape.

The cutting files for each of the paper pieced Tsum Tsum characters were also created in MTC from images found on the web. I cut all the pieces out of plain white or black cardstock and used Copics to color them. Lots faster than having to search through my cardstock stash for all the different colors needed!

Of course Mickey's at the top of the stack...

Here's Chip and Minnie on the second row...

And Eeyore, Donald and Tigger holding up the bottom of the stack!

I added the birthday sentiment (and Pooh!) to the back of the card. Shucks...I was in such a rush that I forgot to take of photo of the card folded flat, but it folds down the same as the original block style card. Had lots of fun putting this card together! Creating the cutfiles for each of the characters was a bit of a challenge but gave me lots of much needed practice with node editing in Make the Cut. Looking forward to adding more characters to my Tsum Tsum collection soon!

Sunday, March 30, 2014

Hello Kitty Baby Blocks

Had another go at the baby blocks card, this time for the birth of a co-worker's new granddaughter. I really love that this card is so super easy to put together. You can find the video tutorial by Papercrafter 45 here.
Since baby's mommy is a big fan of Hello Kitty, I picked up a sweet Hello Kitty quilt (shown in the background) from "Moe Moe and More" and of course had to make a card to match!
Cutfile for paperpieced sweet baby Hello Kitty was created in MTC using a freebie image found over at FreePrintable.com.  Also used MTC to create the alphas on the blocks from New Times Roman font. Squares on the blocks were done by embossing plain white cardstock using Cuttlebug's Love Language embossing folder and a 1" square punch.
On the backside, I added baby's name, "Hilina"i" a lovely Hawaiian name which translates to mean "trust". All baby toy cuts (rattle, diaper pin, duck) are from Cricut New Arrival cartridge, and heart and flower are from the Cricut George font cartridge.
The card looks like this when flattened, ready to slip into an envelope with room enough on the bottom to add a little sentiment. This blocks card is so quick and easy to do that I'm sure I'll be using this as my "go to" card whenever I need a baby card, maybe with just a quick change of the character on the front...


Sunday, November 24, 2013

"B-A-B-Y" Blocks Cards

These baby blocks cards were put together a few months ago for two of our friends who had new additions to their families. These were surprisingly very simple to make and only takes half a sheet of 12 x 12 cardstock. The easy to follow video instructional by papercrafter45 for this card can be found here on YouTube.
The fun part....decorating each of the blocks takes a little longer, depending on how fancy you want to get. I decided to keep mine simple with paper piecings of baby toys. Rubber ducky was cut from a Quickutz die, and the others are from Cricut cartridges. Ball is from Create A Critter, and diaper pin and rattle are from the New Arrival cartridge.
 
The alphabet cuts on the blocks were created in Make the Cut (MTC) using Times New Roman font. I used them to spell "BABY" on the front of the card and the names of the two babies on the back. Fluffy Bear and Bunny are two of my most favorite cutfiles purchased over at My Scrap Chick.
 
 Just love that these cards actually fold flat so I could add my sentiment to the bottom and easily slip them into their envies.  Had fun with these cards and I wish I could come up with other ways of using this block type card other than just as a baby card...any ideas?