Saturday, April 30, 2022

Cherry Blossom Collage Pop Up Card

Today I'm sharing a slimline pop up birthday card I put together for my dear friend Lorna.

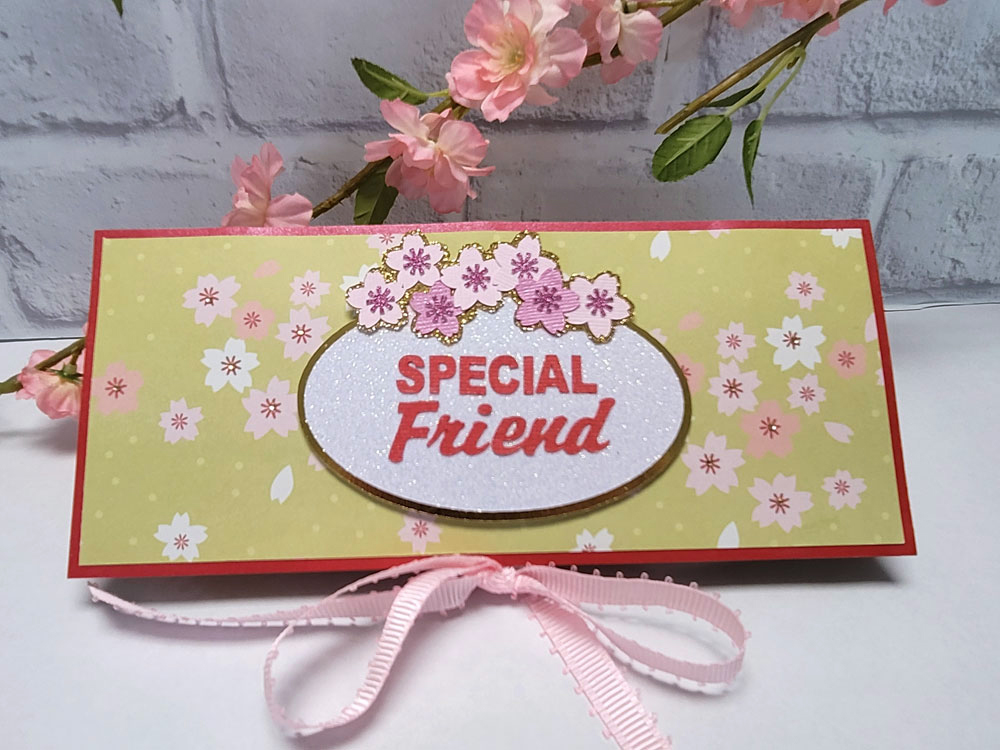
I kept the front of the card plain and simple, using retired sakura patterned papers I had in my stash as the background and an oval label cut from glitter cardstock and embellished with paper pieced cherry blossoms. Arial and Brisk fonts were used to create a svg cut file for the words, "Special Friend". Since the pop up mechanism inside was a bit bulky, I added a length of ribbon between the patterned paper and the card base to create a ribbon tie to keep the card closed.

Inspired by a designer challenge tutorial by Karen Burniston, I added three of the pop up mechanisms from her Heart Collage Pop Up die set . . .

. . . for triple the fun! 

I cut and layered different sized cherry blossoms from glitter and pearlized cardstocks and added them to the spinning arms of the mechanism.

Punches from Nellie Snellen and Punch Bunch were used to cut the different sizes of flower centers. Brisk font was used to create the svg file for the layered "Happy Birthday" sentiment cut from glitter and pearlized cardstock.

Lastly, I added a gift card holder with a cherry blossom closure to the back of the card. Had lots of fun putting this triple collage pop up card together. Looking forward to playing and experimenting more with this pop up mechanism!


Saturday, April 23, 2022

Easter Treats 2022

I'm finally back to share the rest of my Easter projects this week. I made a dozen of these funny but cute bunny boxes this year with the intent of filling them with mini pizzelle cookies and sharing with friends and family.

The original svg cutting file template for these paver-like boxes is from the Lori Whitlock Shop. I sized the boxes up just a bit and made them deeper so I could fit at least a half dozen pizzelle cookies in them.  Because of their funny paver-like shape, these boxes were easy to assemble and came together pretty quickly. Then, just to dress them up a bit, I gave each bunny a paper bow, assembled using a free cutting file from Birds' Cards.

As things would have it, my pizzelle press refused to cooperate this year, so I went with Plan B and ended up baking butter cookies with sprinkles instead. 

Bunny boxes were filled with cookies and chocolate eggs, then wrapped in cello bags tied with a tulle bow to finish.

Every Easter, I keep an eye out for these mini Lindt gold bunnies because I think they're so adorable! 


This year I was inspired by the fun basket packaging Lindt used for a pair of midsized gold bunnies and decided I would try to make something similar for the mini gold bunnies.


To create the baskets, I used the svg template for a hexagon pop up card purchased from the Lori Whitlock Shop and added scalloped sides and a basket handle. I used the Grassy border die from MFT Dienamics and mini flower and circle punches from Punch Bunch to decorate the sides of the basket. Cutting template for the paper bow is from Bird's Cards.

Want to share the fun Easter goodies I received from my crafty friends this year too. This adorable "Bunny Feet Box" filled with decadent and colorful egg shaped cookies covered with powdered sugar (yum!) was created by my sweet and talented friend Kris. Love how this box looks so cute from both the front and back! You can find the svg cutting file for this cutie over at My Scrap Chick.

My endlessly creative friend Lorna blew me away with these three super cute and amazing Easter baskets!

This candy filled scallop edge yellow basket is beyond cute with this irresistible little bunny and butterfly sitting inside!

This beautiful tulip shaped basket is an all time favorite for me. I love how the petals of the tulip become the sides of the basket and sweet little bunny inside is just too cute! Svg cutting file for tulip basket comes from SVG Cuts.

This third Asian "flavored" basket is hands down the most creative of all. Lorna designed and created this basket to be shared with with her Japanese Bon Dance club friends. To create her kawaii Asian bunny, she added bunny ears and a face to a plastic egg, draped a kimono shaped piece of washi paper around it and gave her a fan! Bunny was then adhered to the bottom of a plastic condiment cup filled with treats. A tall grassy border was wrapped around the condiment cup and a handle embellished with cherry blossoms and a butterfly added to create an amazing basket.
Thank you for dropping by for a visit!

Sunday, April 17, 2022

Sending Easter Love Across the Miles

Happy Easter! I have several Easter projects to share so I'll be sharing the card and lollipop holder project we sent our granddaughter today and post the rest of the projects later this week.
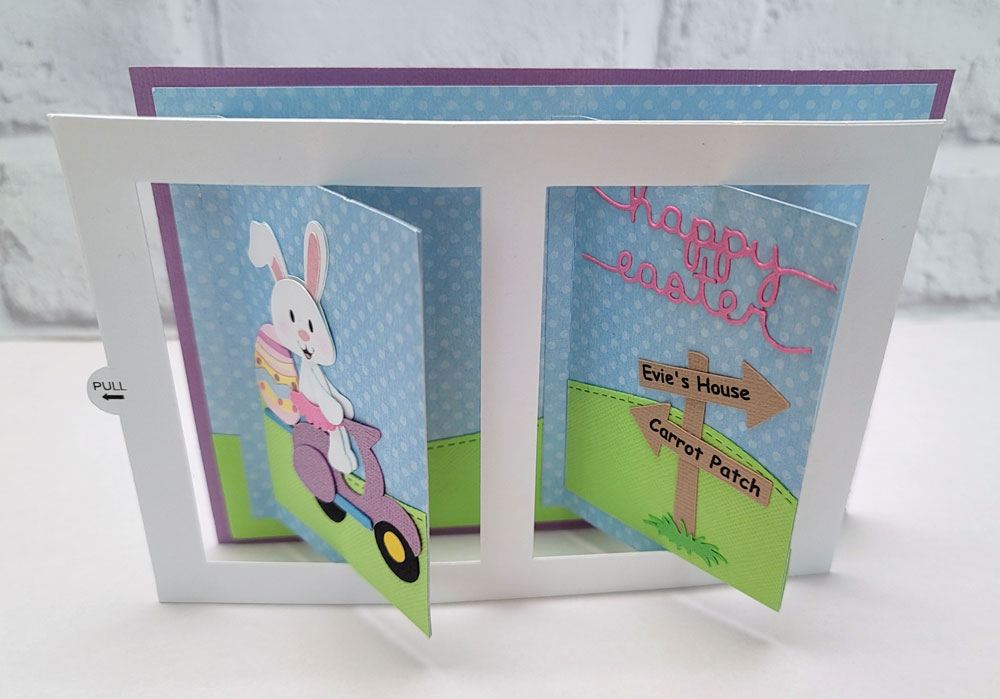
Our Easter card for our granddaughter was inspired by Sam Calcott's video tutorial on You Tube for her Fabulous Flip Cards.
 
I used the adorable bunny cutting files from Marjorie Ann Designs "Bunny Patch" to decorate the first panel on my card. I thought the bunny on the scooter was so cute! Then I added a colorful egg from My Scrap Chick "Easter Chicks Bundle" to the back rack of the scooter for Miss Bunny to deliver. 

On the second panel I added a personalized road sign so Miss Bunny would know where to deliver her decorated Easter egg. "Happy Easter" was die cut from "Easter Border Die" and grassy background from "Stitched Hillside Borders Die", both from Lawn Fawn.

Here's the fun part of this interactive card; pulling on the tab on the left of the frame pulls the double frame forward and to the left...
.... while swinging the two front panels open!

Retired dies "Easter Basket" and "Bunnies and Chicks" from Sizzix were used to create the Easter scene on the inside panels. I really like the fun and dramatic movement of this swing-type card and am looking forward to  making this often. 

A week prior to Easter, I put together a mini craft kit to make these lollipop holders to send to our granddaughter. 

I used My Scrap Chick's "Bunny Sweet Treat Belly" file to cut all the pieces and mailed them together with  this instruction sheet and enough ribbon, tape, and lollipops  to make ten lollipop holders.


Our granddaughter is at the age where she thoroughly enjoys playing with crayons, scissors, paper and glue. (Just like gramma!) But being that she lives many ocean miles away we aren't not able to play together as much as we'd like so I decided to make and send her crafting kits so she can get creative and play just like she would if we could be together. Hope she had fun putting these together and sharing with her friends!

Monday, March 28, 2022

Butterfly Collage Pop-Up

I recently put together this butterfly themed card and gift card set for the birthday of a very special friend. After a bit of searching, I chose this elegant but simple butterfly svg by Samantha Walker from the Silhouette Design Store to use on the front of my card and gift card holder.

While looking for ideas and design inspiration for the front of my card, I came across a card on Pinterest with a butterfly which had been cut using a stencil edge die. I really liked the unique look of it and decided to try and create a cutting file to get a similar look using the butterfly svg I had.

I cut my butterfly edge from pearlescent lavender cardstock and added flatback adhesive pearls to the  body. The word "celebrate" was cut using "Sentimental Elements" die from Avery Elle.

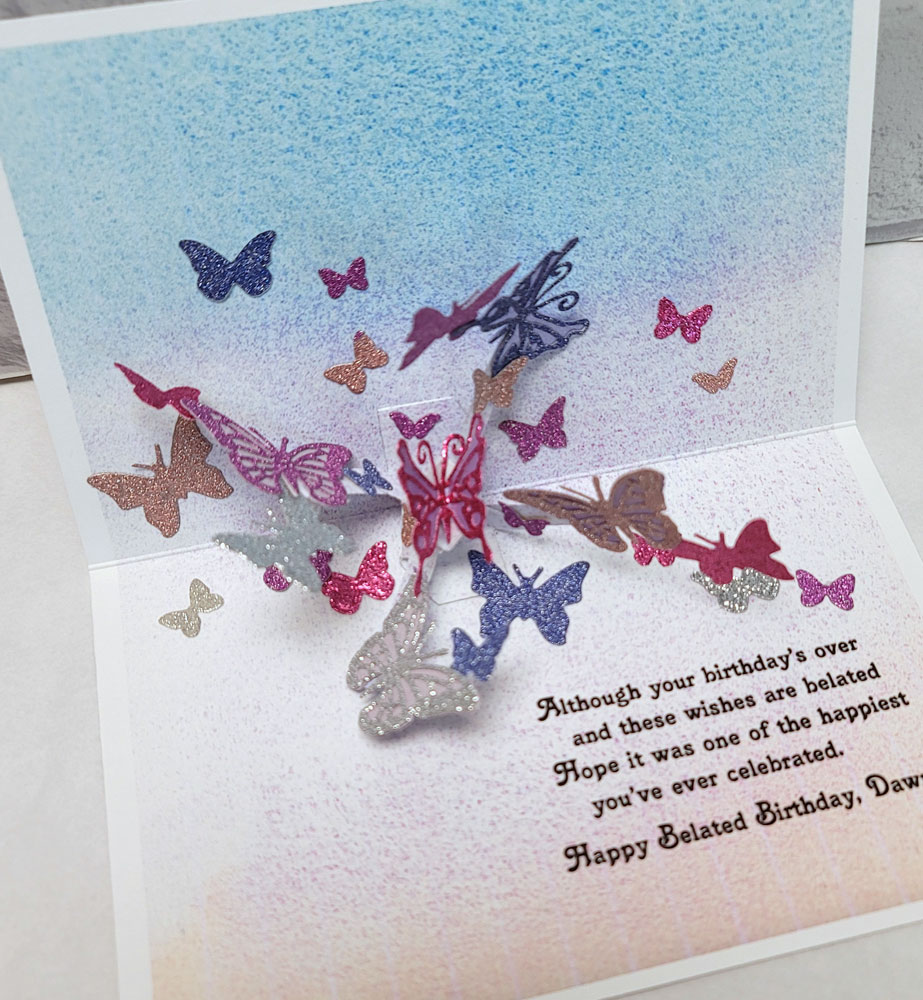
Inside the card, I was excited to use Karen Burniston's new Heart Collage Pop up Die for my first time to animate a kaleidoscope of glittery butterflies.

The mechanism for this new die is the same as its predecessor, the Photo Collage Pop up Die, but just in a smaller size to fit into narrower cards like slimline cards. 

What I like most about this smaller size is that I can attach smaller elements, and more of them, to the spinning arms for a fun "wow" effect. Instead of using the different sized heart shaped dies that come included with this die set, I used butterfly dies I had collected over many years. I used Cheery Lynn Small Exotic Butterflies, Memory Box Butterfly Delights, and Stampin' Up Beautiful Wings dies to cut butterflies of many styles and sizes from glitter cardstock to add to my card.

I used the same butterfly from the front of the card to embellish this matching gift card holder with a fun closure.
To open, butterfly wings are folded together and slipped through the opening on the box lid.

So happy to finally finish and present this very belated birthday gift and card to my sweet friend. I hadn't been feeling very creative lately, but I have to admit I had so much fun putting this little set together that I think I'm starting to enjoy crafting again. Yay and hurray!

Sunday, March 13, 2022

You Are A Warrior Princess

This is the card I made to send to a very special young lady in our lives when we learned that she was going through chemotherapy after she had a recurrence of breast cancer. It broke my heart to hear the news, especially since she is the sweetest person with such a bubbly and effervescent personality. She always exudes a contagious kind of joyfulness to those around her. I wanted to send this card to cheer her on to stay strong!

I came across several of the cutest chibi style Wonder Woman svg files over at Etsy and thought they would be perfect for the message I wanted to send. I used lots of glitter and pearlescent cardstock as well as added accents of glitter glue on my paper pieced Wonder Woman to make sure she would stand out and wow!

 
On the inside, I attached a flying image of Wonder Woman to Karen Burniston's Katherine Label Pop Up mechanism. 

As the card is opened, little chibi Wonder Woman pops forward and "flies" up above the top of the card. to "Rise above the storm"!

I enjoyed putting this card together, and I especially liked that the message inside is strong, caring and full of encouragement.

Sunday, March 6, 2022

Double Z Fold Birthday Card

Here's a fun Double Z Gate Fold birthday card I put together for our daughter's birthday last year but haven't had the chance to post until now.

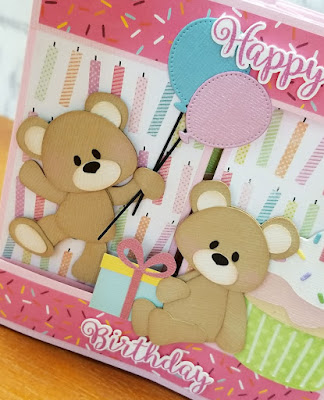
For this card I cut and pieced together several of my favorite bears by Kristi W Designs named "Patches". I think he's adorable and love that he's simple to piece together. Paper piecing cut file for "Patches the Birthday Bear" can be found at Marjorie Ann Designs.

Decided to do a Double Z Gatefold style card so there would be room enough for all four of the paper pieced teddies.  In addition to the balloons and gift cuts included with the cutting file from Marjorie Ann Designs, I also used the  "Happy Birthday Cat" cutting file from Kadoodle Bug Designs for the cupcake and a stitched balloon die, "Balloon Galore" from Craft Emporium. Happy Birthday sentiment on the front was created as a print and cut using Ballerina font.

Pulling on the right and left sides of the card opens this gatefold card.


In this view you can see the "boxes" that are created in the card by adding border strips on the top and bottom edge of the card

Struts were added inside these "boxes" where I could adhere the bears, balloons and presents.


Birthday sentiment was added onto the backside of the card. Really had fun putting this Double Z Gate fold card together. Template and instructions for this style card may be purchased at Addinktive Designs. The base of this card spans 15 inches, providing lots of room for plenty of fun embellishments.