Sunday, August 16, 2015

Sister Stamps BFF Birthday Celebration

Coming up with a card worthy enough to send to my dear and super talented friend Patti of Creations By Patti for her birthday is always a huge challenge for me. After weeks of scouring the internet for something fresh and new, I finally decided to try the 3-D Scenery Card I saw over at Card Making Downloads. I think I must have watched the video tutorial for this 10 times or more before I finally figured out the mechanics on how this card is put together. LOL, and even then it took me over a week to come up with a working template!

The neat thing about this card is that it's kinda sorta like a box card, but it has a window with shutters that slide open to reveal a scene inside. For the base of my card, I used MTC and tried to create a Japanese style house with shoji doors that slide open. On the outside of the house I used an image of a tree with branches found on the internet and rendered it into a cutfile with MTC. Filled the branches with sakura cut using the Petite Sakuras die from Frantic Stamper. The coolest thing about this 3 x 3" thin metal die is that you can die cut 29 blossoms (4 different sizes) at one pass! I only needed to run it through my Big Shot 5 or 6 times to get enough of the smallest size blossom to fill my trees...great time saver!

On the inside, I used my favorite BFF stamp from Sister Stamps, colored them with Copics and paper pieced their kimonos with washi paper.

The "chochin" or hanging lanterns were created in MTC by welding circle and rectangle shapes together.  I used Copics to color them and ran them thru a crimper to add some fun texture before hanging them onto some black embroidery floss.

Here you can see how the stamped image was adhered to a slider inside the box.

Here's a top view of the card from the front...

...and a view from the back where I added a birthday sentiment. A little hard to see, but that tab towards the bottom of the box is the end of the slider that holds the stamped image on the inside.

Here's the card with the shoji doors closed...

Sliding the shoji panels into it's closed position also collapses the card so it can be put into an envelope. Had fun learning how to re-create this new style of card. Still need to play around and tweak the template for this card a bit more before I try another. Maybe then it can be my new favorite type of card to make!

Sunday, August 2, 2015

Clothesline Baby Card

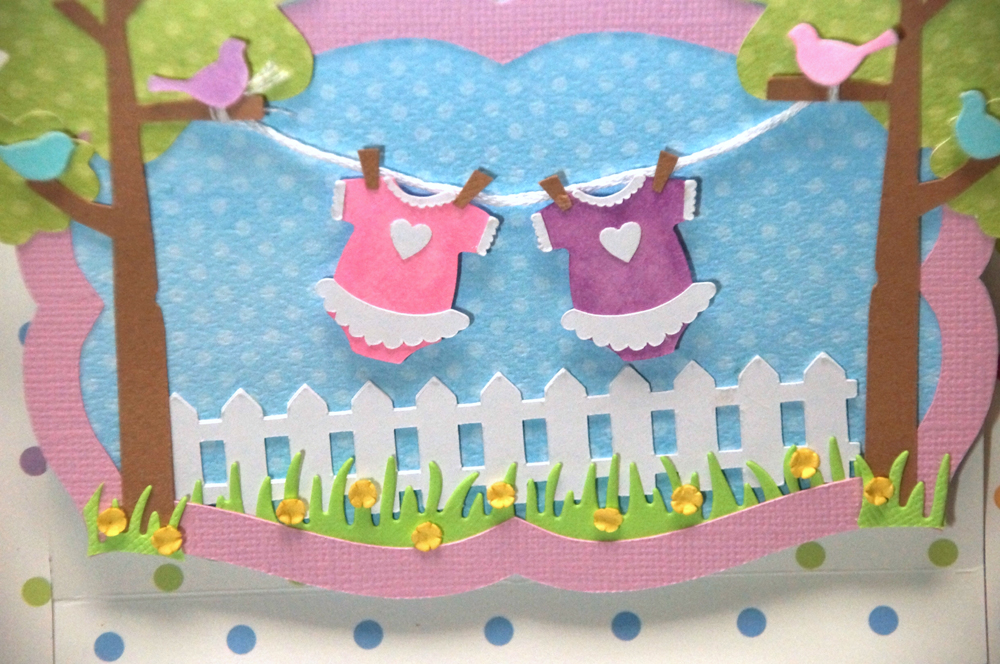
Had to come up with a quick card for a baby shower couple weeks ago for a friend at work who's expecting twin baby girls...and all I can say is, "Thank goodness for Pinterest!" Saw a lot of darling clothesline baby cards and hoped I might be able to put one together pretty quickly.

Found several pins for Onesies on Pinterest, and chose to use a freebie file offered over at the Quilling Patch. No time to spend on choosing colors so I just cut them in white and colored them in with Copics later when I had time to think. Trees are a cutting file from Miss Kate's Cuttables, and I created the picket fence in Make the Cut (MTC) by simply welding triangle and rectangle shapes together. Thin steel dies were used to cut the grassy border (DieNamics), birds (Memory Box), flowers (CheeryLyn), and fancy corners (Cuttlebug). Frame is another a freebie cutting file from Heather M. I cut a length of white of white embroidery floss and tied to the tree branches for the clothesline.

I decided to put my clothesline scene on a Surprise Pop Up Slider Card, instructions by Beate Johns can be found here. Pulling on the tulle bow at the top of the card slides the clothesline scene back and up, revealing a place underneath it for a message or sentiment.

This top view shows the slider attached to the tulle which pulls out with more room to add a message.

And here's a side view that shows how the front cover folds back and up in a way similar to an easel type card. Not at all fancy, but I think the sliding movement of this type of card always makes this a fun card to receive.

Sunday, July 26, 2015

"Tsum Tsum"-ing by with Birthday Wishes


Do you Tsum Tsum? An intern at work introduced me to this adorable  mobile app game about a year ago, but I didn't start playing the game until recently. I still don't play it much, LOL, mostly because I don't understand the game...but it's fun to play just to see those adorable Tsum Tsums! Found out from my sister in law that you can even buy Tsum Tsum plushies at the Disney Store...apparently she has quite a collection of them herself!
That's when I decided I would try and make a Tsum Tsum themed card for her birthday.

After some quick internet searching I learned that the name "Tsum Tsum" comes from the Japanese word "tsumu" which means "to stack". With that in mind, I thought a stack of Tsum Tsums on a block style card might be kinda cute. The original block style cards that I've been making till now has blocks stacked in a "L" shape. But since I wanted to do something a little more pyramid shaped, I altered the original block card a bit in Make the Cut (MTC) and came up with this shape.

The cutting files for each of the paper pieced Tsum Tsum characters were also created in MTC from images found on the web. I cut all the pieces out of plain white or black cardstock and used Copics to color them. Lots faster than having to search through my cardstock stash for all the different colors needed!

Of course Mickey's at the top of the stack...

Here's Chip and Minnie on the second row...

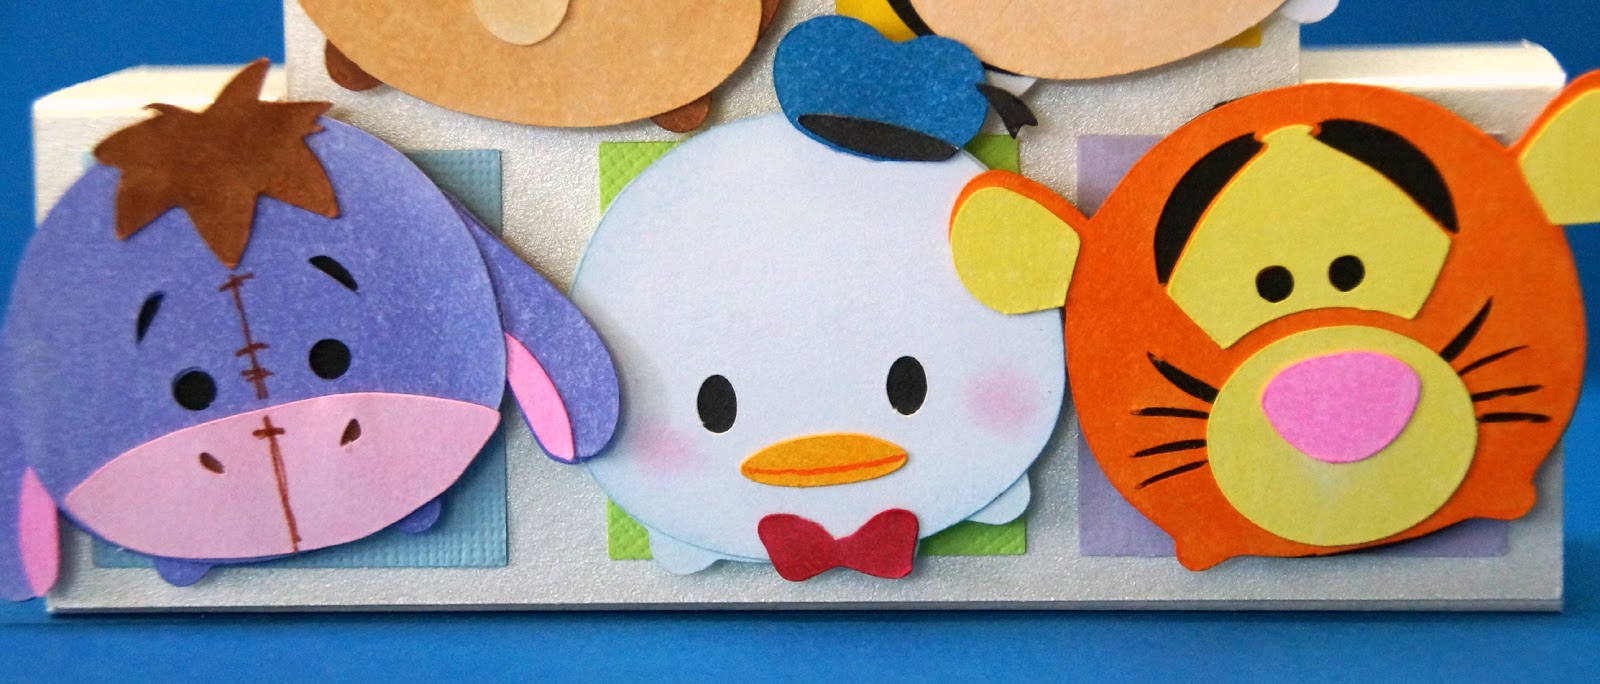
And Eeyore, Donald and Tigger holding up the bottom of the stack!

I added the birthday sentiment (and Pooh!) to the back of the card. Shucks...I was in such a rush that I forgot to take of photo of the card folded flat, but it folds down the same as the original block style card. Had lots of fun putting this card together! Creating the cutfiles for each of the characters was a bit of a challenge but gave me lots of much needed practice with node editing in Make the Cut. Looking forward to adding more characters to my Tsum Tsum collection soon!

Sunday, July 19, 2015

The Cat In the Hat Wants to Have Fun!

While searching the web for "Dr. Suess-isms" to use for the graduation card I posted last week, I came across a ton of super cute Dr. Seuss ideas that I couldn't resist pinning...and it's a good thing I did since my next card project just happened to be a baby's first birthday card for my cousin's grandson who was having a storybook themed party. What better story to use than everyone's favorite "Cat In The Hat"!

I was completely in awe and inspired by Odette Martinez' adorable Cat in the Hat party invite as well as Cheryl from Crack of Dawn Crafts and her clever "Thing Box" when creating this card. I used an image of The Cat in the Hat found on the web, rendered into a cutfile with MTC. The cutfile for the red crate box was also created in MTC by welding shapes together. And I really loved the blue chevron paper Odette used for her invites, but didn't have any on hand so had to improvise by making my own. Just connected little blue rectangles together in a repeating zig zag pattern in my Print Shop program...and voila!...faux chevron patterned paper!

Wanted to make this a fun interactive card that a child might enjoy so I chose to do a Covered Slider Card, using the template shared by Chia Wald of Chia's Rubber Stamp Art. I added an extra large pull up tab to the slider, easy enough for little fingers to grab a hold of...


...and pull up on. As the sentiment on the slider pulls up at the top of the card...


...up pops Thing 1 and Thing 2 from the red crate!

Had so much fun putting this card together, all the while reminiscing about how much I enjoyed reading the "classics" from Dr. Seuss out loud as a child and once again as an adult to my daughter growing up.

Sunday, July 12, 2015

Graduation: Words of Wisdom from Dr. Seuss

Only had one graduation card to make this year, for the son of one of hubby's co-workers. Unfortunately, I was lost for any fresh new ideas, so I ended up going with my old favorite recessed window card again. For this card, I used a photo of the graduate's high school campus inside the recessed window and made a few subtle changes to the front cover panel of the grad card cutfile that I created a few years ago. Of course I updated the year to "2015" and changed the graduate's name (partially blocked out in photo for privacy). But this time around I also flipped the graduate image to face to the right and by moved the "Class Of" to the bottom of the window. I thought this helped the campus photo show up better and seemed to make the card look more "balanced".  And as you will see below, I completely changed the inside of the card...

Oh...and I also added a paper pieced hot air balloon onto the window to give a hint of what's inside the card...

Totally inspired by the graduation cards created by my blogging pal, Patti of Creations By Patti, I decided to add Four Step Pop Up insert for a fun surprise to the inside of this card.

Using the Four Step Card template designed and shared by Norma on her blog, From My Craft Room as a guide, I created a cutfile using Make The Cut (MTC) to fit inside my card.

The hot air balloms are a freebie cutfile from SVG Cuts, and clouds were cut using the Swirly Clouds die fromTaylored Expressions.

I added an excerpt from everyone's favorite Dr. Seuss...remember this one? It's from "Oh! The Places You'll Go!" A bit of childhood advice from Dr. Seuss that never grows old.

Here's the Four Step Pop Up Card from the top. I was happy that once I had the template for the insert cut, the assembly of this fun pop up card was quite easy. Pretty sure I'll be making this type of card again real soon.


Tuesday, July 7, 2015

From Paper Crafting Pals...


Goodness! Have you noticed it's July already?!!! Gosh,why does it feel like I'm just standing here while the year goes whizzing by? And no surprise...I've fallen behind and have been shamefully late with everything...including the sharing of these special gifts I received from my very dear crafting pals.
This super kawaii post it note holder was a surprise RAK I received from my blogging pal, Karen of Have A Scrappy Day. Karen is the sweetest, most generous person, who spends much of her crafting time every year making hundreds and hundreds of cute gift items such as these to be sold at a craft fair with proceeds donated to the American Cancer Society. I loved her post it note holders with mini pens so much that she sent me one together with the template to make my own. I can hardly wait to try these!

This very special little album was a gift from my super creative crafting bestie, Kris. Among all her crafty talents, Kris is also amazingly skilled at the art of binding. This mini album is actually a calendar...

Each page in this album is a monthly calendar with pockets, bound together to create this fabulous album...perfect to use as an organizer, or better yet. a cool way to record memories and store memorabilia.


I just LOVE how she decorated each page with images of sweet Pochacco!

Each page opens up to a large monthly calendar with lots of space for jotting notes together with a large pocket on the back to store ticket stubs, photos and other memorabilia. 


This clever lantern treat holder was created by none other than my talented and creative friend, Lorna. Summertime means it's O-bon season in Hawaii, and Lorna designed these cute treat holders to share with friends in her O-bon dance club. If you look closely you'll see the candies wrapped in cellophane inside the lantern, held in place with ribbon.

Look how she took the time to beautifully and meticulously decorate the tops of each lantern with a flying crane cut out and glittered sakura!


Here's another take on a summer lantern from the amazing Patti of Creations By Patti. How cute is this PINK pineapple treat holder! (Obviously she knows my favorite color!)

 Here's a closeup of the matching Hawaiian themed gift tag, embossed with a hibiscus folder and decorated with stamped and die cut images of a hibiscus and palm frond from Jaded Blossom.

Wow, even the chocolate treats inside were individually decorated with stamped images!

And the best part yet...Patti included a little battery powered tea light...

What a delightful decorative accent this will be for our next barbeque!

Aren't crafty friends the BEST?  Hope their clever projects sparked your creative imagination as much as they always do for me!

Saturday, June 27, 2015

O-"FISH"-ally the Best Dad

Here's another Fathers Day card, this one created for my dad. My dad is a man who has had many different hobbies, one of them being raising and breeding tropical fish. I vividly remember growing up with a patio full of aquariums...over fifty of them...all immaculately kept and filled with dozens of beautiful varieties of gouramis, tetras, mollies and barbs. Dad raised and bred his fish, selling them to local pet shops to earn money to buy fish food, supplies and even more aquariums to keep his hobby growing.  So when I came across Ilda Dias' fabulous Box Card style aquarium, I was immediately inspired and knew I had to try something similar for dear old Dad.


As you can tell from this top view of the card, the  construction of aquarium is basically the same as with the familiar Card In A Box style card that has recently become quite popular. Only difference is that I added the struts on both the top and bottom of the box and cut a window in the front panel. The paper pieced fish were glued onto strips of clear acetate which were attached to the top and bottom struts, to make them appear to be swimming in the aquarium. Coral and seaweed were attached to the bottom struts. After I had everything inside placed where I wanted, I adhered a piece of acetate to fit inside the window frame to enclose the box and make it look like a fish tank.

The cutting file for these cute pair of clownfish was created and shared by Make The Cut (MTC) forum member Berryone in the MTC Gallery. Coral and seaweed are Cricut cutting files from the Life Is A Beach cartridge. And the ocean scene used for the background is a very old patterned paper from Flair Designs which I found in my scrapbook paper stash.

Used the same paper on the back of the aquarium as a backdrop for my sentiment.

And here's the card folded flat. Poor Dad had to spend his Fathers Day this year in a nursing facility recovering from some health issues, but it was nice to see his face light up for a brief moment as he opened this card. And the good news is, his physical therapists decided yesterday that he's finally strong enough to go home next week. Hurray! It'll be nice to have Dad home again and our lives return to some normalcy.