Sunday, August 28, 2016

More Panda Fun

As promised, here are a few more panda themed projects that resulted from my recent panda lovin' mood. This first one is actually a "boxy" envelope I put together to hold some gift cash I wanted to give to congratulate my sweet niece who just passed her nursing registration exam. Used the adorable panda stamp from Mama Elephant's Pandamonium set again and the same word bubble cutting file and left over patterned papers from the BFF Panda card in the previous post. Also used Ballerina font once again to create the cutting file for the "hurray".

Here's a look at the backside where I added the sentiment...

And here's the envelope open with the insert that holds the gift cash. Easy peasy and super quickie!


The next two panda projects are gift card holders. This one was inspired by my dear blogging pal Tina of Scrappin' Rabbit blog. Not too long ago Tina posted several super cute doggie gift card holders she had put together here that I totally fell in love with. Decided to try something similar with a panda instead. I used a panda head image found on the internet and created the arms and body by welding together ovals and rectangles in Make the Cut. Panda's arms are tucked under the heart he's holding to keep the card closed.

To open, untuck the arms from the heart...

...and untuck his chest from under his chin to reveal the sentiment and pocket for the gift card inside. Thought this was such a clever idea for a gift card holder! The best part is that you could probably add just about any animal or doll head to this to suit your fancy...Santa or snowman would be fun for the holidays!

This second super kawaii gift card holder is from a Make and Take hosted by sweet Kelli S. at our craft club meeting last month. Isn't this just too adorable?!!! Goodness! How did Kelli know that I was in a panda lovin' mood?

This gift card holder is pieced together to look like a gift box, complete with a hanging tag and lovely paper bow with cutie panda peeking from behind. Paper pieced panda comes from Cricut Create A Critter cartridge and the paper bow pieces were punched from Stampin' Up's bow punch.

A tiny piece of self adhesive velcro keeps the card closed, and inside a pocket for the gift card and lots of space below to add a sentiment. Despite all the controversies about gift cards, I still like to give and receive them...and I promise I put a lot of love and thought into making the gift card holders they came in!

Sunday, August 21, 2016

BFF Panda

Found myself in the panda-lovin' mood again lately so I started making a few panda themed crafts for fun. Decided my BFF needed a panda card for her birthday!

Found a cute panda image online, converted him into a cutting file and enlarged him using Make the Cut program so he'd fill the entire front of the card.

I was itching to have another go at the Pop Up Accordion Panel Card I made for the first time a few weeks ago, but this time I changed the shape of the accordion panels to hearts.

Here's how the card looks on the inside when completely open. I am totally in love with how the accordion folded heart panels lift up and spread open as you open the card!

I used Make the Cut to weld heart shapes together for the accordion panel and to create the cutting file for the sentiment using Ballerina font.

Here's a side view showing the V-fold Pivot mechanism that creates all the fun movement and pop up on this card. You can view the video tutorial for this card by Kevin Devine on You Tube here. I had to make one small change since I changed the shape of the panels from rectangles (on the original tutorial) to hearts. To prevent the pivot handles from showing when the card is opened, I cut the original pivot handles off and replaced them with narrower strips of cardstock glued to the inside of the V-fold.

Used my favorite panda stamp from Mama Elephant's "Pandamonium" set to decorate the inside of the card. Had so much fun making this! Stay tuned for a couple more panda projects coming up next!


Monday, August 15, 2016

Missing You...

Sent a care package of assorted rice crackers and furikake to my daughter and son in law last week to liven up their gluten-free diet and let them know we miss them a lot.

Here's the card I included in the box. It's one of those window cards with acetate for the window...it's been years since I've made a window card so I thought it would be fun to try making one again. The window and curtains were created in Make the Cut program by welding shapes together.

The paper pieced puppy is a cutting file called "Puppy Love" purchased from "Little Scraps of Heaven" I used the standing puppy file, but changed the order of layering the pieces and added a tail to make it look like a back view of a standing puppy.


Then when the card is open, you see puppy's face peeking through the window! To the outside view of the window, I added a flower box with some colorful flowers. Grassy border was cut with a die from DieNamics. I used Cheery Lyn's "Baby's Breath blossom" die for the tiny flowers in the grass and tree is a cutting file from Cricut "ZooBalloo" cartridge.
Had so much fun putting this card together, especially since puppy looks like our own little Latte who misses our daughter and son in law "a latte" too!

Sunday, August 7, 2016

Pop Up {Accordion} Panel Card

I'm excited to share a fun new (new, at least for me!) pop up card I recently made for a very special friend's birthday. For the front of the card, I used a paper pieced portrait of a girl...if she looks familiar, that's because it's the same paper piecing I used for my "Island Style High School Graduation" card. I just gave her a change of clothes and dressed her in a Chinese style dress or Cheongsam which I created in Make the Cut.

I kept the front of the card very simple. Just added the words "special friend" to the bottom, created in Make the Cut using Ballerina font. On the inside, I added a fun pop up insert. Much of the fun of this card is in opening it and watching the pop up unfold. Still photos can't capture this so here's a short video to see it in action...

Pretty neat, huh. I saw this pop up for the first time posted on Little Scraps of Heaven Design Team Member Amanda's blog, a-prata-design. Amanda was kind enough to share the link for the You Tube video tutorial by Kevin Devine, found here. Of course, I had to give it a try!

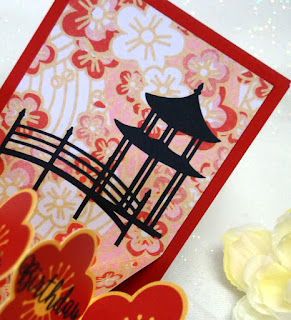
Here's what the card looks like fully open. Instead of the accordion folded rectangle panel on the original card, I decided to change it by using a row of accordion folded plum blossoms to match the theme of my card.

To do this, I used Make the Cut to create a cut file of the plum blossoms with a shadow layer from an image found on the web. Shadows were then welded together in a row, cut out, then folded accordion style. I used Ballerina font once more to create the cut file for "Happy Birthday" and added it to the center blossoms.


Pretty plum blossom paper for the pop up insert comes from Sheena Douglas' "A Little Bit Oriental" Designer Paper Pad. Pagoda and bridge cuts are from Cricut Pagoda cartridge.


Here's a view from the side which shows the V Fold Pivot mechanism that makes the accordion folded panel unfold and pop up. In his video tutorial Kevin simply calls this card a "Pop Up Panel Card". But since "Pop Up Panel" describes many other types of pop up cards, and mostly for my own benefit, I think I'll be referring to this as a "Pop Up Accordion Panel Card" in future posts to avoid confusion. And yes...LOL...I do get very easily confused!