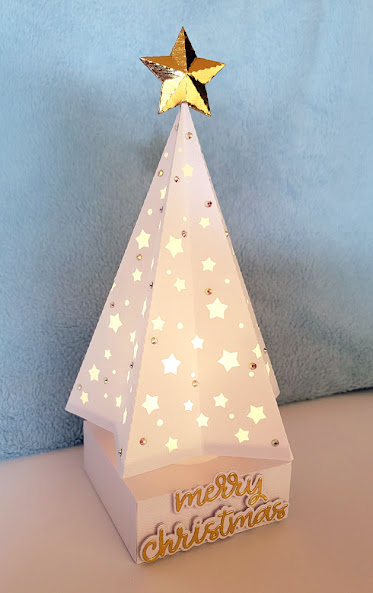
I put together these Christmas tree lanterns or luminaries to be used as gift card holders to give to friends and family this holiday season.
The original svg template for the tree and star for this project was designed by
Makamo Creations. I sized the template to as large as I could cut from a 12 x 12 sheet of Diamond Bazzill Bling cardstock and glued vellum panels inside. I should mention that I also added a few extra star cuts on each panel of the tree to maximize the lantern glow. Once cut, the tree itself was very easy to fold and assemble; the gold star on top: not so much. Since I knew I would be needing a place to include a giftcard, I added a tree trunk and a square box as a base for the tree to stand.

The 3D star tree topper was probably the most challenging part of this entire project for me. The gold metallic foil board I chose to use was not very pliable and although I watched in amazement how the designer assembled the star using a hot glue gun in the tutorial, I knew there was no way my fingers would be able to stand the heat. Instead I opted to use Beacon 3 in 1 adhesive because I knew I'd be able to wipe off most of the excess glue mess with Un-du adhesive remover. I also glued several flatback crystal gemstones in two sizes to each tree to give the tree some sparkle.
I made a cylinder from cardstock and attached it over a circle I had cut in the bottom of the tree for a tree trunk. This trunk was then glued directly over a circle I had cut on the top of a square box for the base of my lantern. Gold foil board and glitter cardstock cut with Photoplay's "Merry Christmas" die was used for a glittery shadowed greeting and adhered to the front panel of the base.
Here's a view inside the box base with the flap lid open. Adding the cylindrical trunk and box created a place to easily access the on/off switch to the flameless candle for the lantern as well as a place where I could enclose a gift card.
These are the enclosure cards I made to hold the gift cards I placed in the base box of the Christmas tree lanterns. The front of the card is a piece of white cardstock hot foiled with Papertrey Ink's "Cascading Dots" plate which was layered on top red and green metallic foil board. Spellbinder's "Sealed Twine" die was used to cut the faux twine border from gold foil board and I added red and green Merry Christmas wax seals. I used a Marvy Uchida DecoColor gold paint pen to color the impression on the seals.
This is what the Christmas tree lantern looks like with the flameless candle turned on.
After wrapping thirteen Christmas tree lanterns in cellophane and gold ribbon, these tags were tied on. I used the foiled cardstock left over from making the gift card enclosures, matted on gold foil board. Simon Hurley's "Joyful Christmas Sentiments" plates and dies were used to foil and die cut the sentiments. Inside, the tags included instructions to each recipient on where they would find the on/off switch to the lantern as well as their gift card.


