Sunday, May 14, 2023

Mothers Day Box Cards

I have two Mothers Day Box style cards to share today. One I made for my mom and another which was sent to me by a very sweet friend. This first box card made for my mom was inspired by Spellbinder's Large Die of the Month for March called "Flowering Tree". When I saw all the beautiful box cards others were creating with this die, I knew I had to add it to my collection too. 
   
Initially I had imagined making all sorts of fun cards using this die by adding cute stamped or paper pieced critters sitting under the pretty flowering tree. I guess I was so excited that I neglected to pay close attention to the finished card size (3x5") which was too tiny for even my smallest critter stamp. But since I really had my heart set on having the tiny kokeshi dolls from Dandelion Design's "Enjoy Today" stamp set stand under the tree for my card, I knew had to make a few size adjustments to make it work. I started by creating a cut file in Make the Cut for a template similar to the die for the base card, but in a larger size and next, I made an extension to add to the tree trunk so it would be taller. 

I also created a cutting file for the "Happy Mothers Day" greeting using Arial and Commercial Script fonts. The original Spellbinders die was used to cut the tree branches, textured leaves and pretty blossoms that I loved most about this die set.
Dandelion Designs adorable kokeshi dolls were stamped, heat embossed, colored and their kimonos paper pieced.

I also created a matching inset to add to the back of the card so I could add our Mothers Day sentiment. In the end, I was happy with the finished card and more importantly I learned that I need to be more careful to take notice of the size of the dies I'm purchasing.

This is the absolutely amazing box style card I received in the mail for Mothers Day from my dear friend Bev. I just love the intricate cuts and all the tiny, tiny details on this card!

Designed by Furrow and Feather, the svg cut file for this "Rattan Plant Shelf Box Card" can be found on their website together with several more similarly beautiful intricate cards. 

In addition to the delicate cuts of the rattan shelving, I was really amazed at the details of all the tiny plants, candlesticks, books and other items on the shelves. Imagine the eyesight and fine motor skills required to assemble this card!

A fancy label inset was added to the backside of the card for a personal message. I continue to be intrigued by the many forms and shapes of different kinds of box style cards. I love that talented designers and crafters come up with so many fun versions of box cards!


Monday, April 24, 2023

Dandelion Designs Sliceform Birthday Card

It's been awhile since I've done any stamping so I pulled out my stash of adorable stamps from Dandelion Designs to pick images to use on this birthday card.
 
 I chose this cute Japanese girl with balloons image from the "Happy Wishes" set for the front of my card. For her printed kimono, I stamped her image onto digital washi paper, fussy cutting only the pieces of the kimono.  The pieces were then adhered in place onto another image that  I had stamped on  white cardstock. Copic markers were used to color in the rest of the image and I added Stickles glitter glue for some sparkle. Cuttlebug "Simple Flowers" embossing folder was used to add texture to the panel behind the stamped image. "Birthday wishes" stamped sentiment comes from Mama Elephant's "Lunar Extras" stamp set; and I added a few sequins to add a little shimmer.

On the inside, I added a fun sliceform pop up with a few more adorable cuties from Dandelion Designs.
The svg cutfile for the sliceform base of this pop up comes from the Lori Whitlock Store. I purchased a few of of the cute interchangeable sliceform cards from there and realized that it would be easy enough to add almost any paper pieced or stamped images onto the sliceform base to create a pop up card.

I added kimono girl and cherry blossom stamped images from Dandelion Designs "Friends" and "Arigato" sets to the sliceform base. For the die cut background image behind the two girls I used Tutti Designs "Asian Landscape" die cut from white cardstock and colored with Copic markers.

I also added a little cupcake kimono girl from the "Happy Wishes" set to the left side of the card...

...and my belated birthday sentiment to the right side.

I wanted to create a matching gift card holder so I embellished a box which was assembled using Karen Burniston's Slider Box die. I stamped and colored Dandelions Design's "Junko" mini stamp and used Lawn Fawn's "Happy Birthday Border" die for the sentiment.


To add a little excitement, I used Karen Burniston's "Bam Box Pop Up" die to create a mini rubber band activated "bam box" which was glued into the slider box behind the giftcard. When the drawer to the box is pulled open, the bam box pops open, lifting the giftcard into an upright position!


Sunday, April 16, 2023

More Easter Goodies!

 Easter has already passed but I want to share some of the very fun and creative Easter treat boxes my crafty friends created.

These kawaii Easter Bunny Daruma were put together by my sweet friend Lorna. Lorna made these in pretty pastel colors to share with her Bon Dance Club friends. She attached individually wrapped Boba Mochi treats to the backs of each paper pieced Bunny Daruma. Now that's a creative Easter treat idea with an Asian twist!

This pretty Spring Lantern Basket was also designed by Lorna. She used a svg cut file template for a pumpkin shaped box from the Lori Whitlock Store which she very cleverly altered. By adding a top and base, she transformed a pumpkin box into this lovely paper lantern! The cherry blossoms embossed on the side panels together with the addition of the delicate cherry blossom embellishment and rabbit gift tag really makes this a wonderful "Chochin" (Lantern) basket perfect for celebrating Hanami or Cherry Blossom Viewing Festival in Japan.

This mini pizza box style Easter treat holder was put together by my dear friend, Lori. Love how she decorated the lid with an almost 3D image of this irresistable little bunny. Inside the box is divided into two compartments; filled with candy on one side and a purse sized bottle of hand sanitizer on the other.

My crafty friend Kris shared this pretty egg shaped window treat box. This classic treat box from SVGCuts is a holiday favorite with it's pretty lid and fun peek a boo window giving a sneak peek of all the goodies inside.


These two Carrot House treat boxes were also created by Lorna. I love the idea of Easter Bunny living in a carrot shaped house, and love even more that Lorna was able to create the idea into treat boxes! SVG template for the carrot shaped lidded box on the right comes from Studio Illustrado at the Silhouette Design Store, and I believe the inspiration for smaller carrot house on the left came from an illustration.I hope you enjoyed seeing some of the fun and creative treat boxes shared and created by others and hope they may have inspired you to get crafty too.


Sunday, April 9, 2023

Fun Easter Treats

I put together these Easter candy holders to share with friends and family this year. I had so much fun making the Panda chocolate kisses holders for Valentines Day that I knew I wanted to make something similar for Easter.    
 
I purchased the template/cutfile for this bunny dome candy holder from seller Papaya Creativa on Etsy. She has designed many different styles of these candy holders for almost every occasion as well as for themed birthday parties. All of these candy holders use clear fillable ornament balls as the dome to hold the candies. Since you only need half of the ball for each candy holder, it's possible to make two from each ornament ball.

The original template for this was designed as a Valentines Day treat holder but I made a few small changes like adding a carrot for bunny to hold, and changing the base that bunny is sitting on to make it more appropriate for Easter. I also aded a few die cut flowers to decorate the front.

This bunny template came with a square envelope for its base but I decided to change it to a hexagonal petal style envie similar to one that some of the other candy holders on site come with.


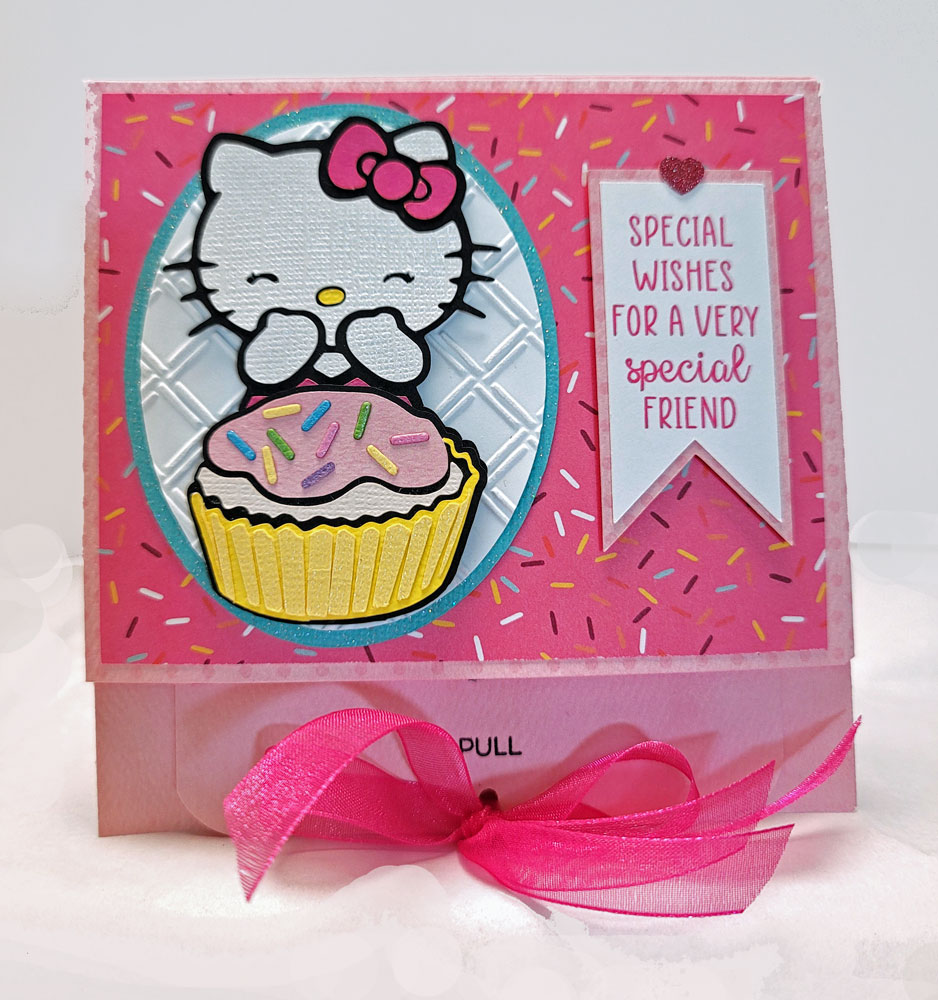
Inside the hexagonal envelope, I added a round shaped card designed using Doodlebug clipart from the Lori Whitlock Shop. As you can see, access to the chocolate eggs inside the dome is behind the card!.

It was fun putting these domed candy holders together. I'm sure you'll see me making more of these  (maybe for Halloween?) since I purchased of boxful of  the plastic fillable ornaments from Amazon!

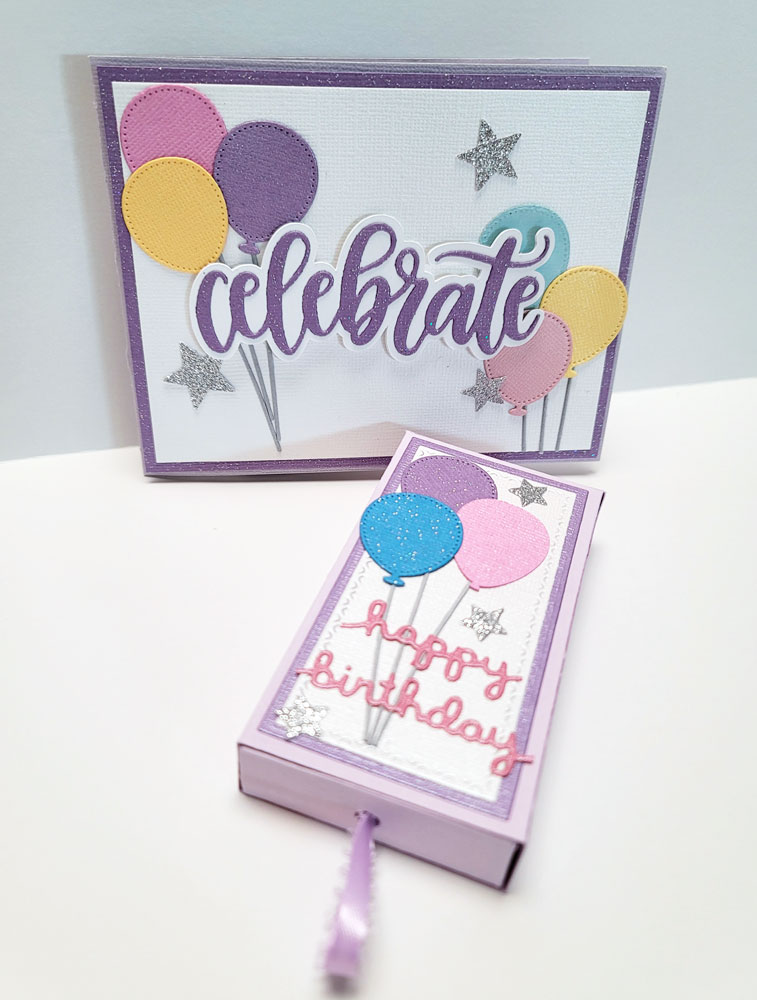
I also put together a dozen of these boxes to fill with Easter cookies for sharing with friends and family.

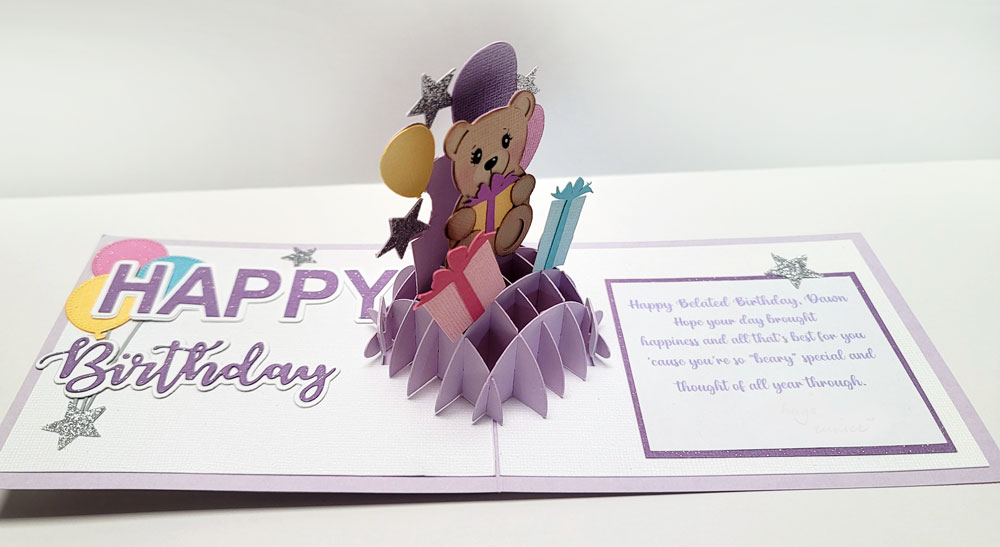
This box style is something I've been imagining in my head and wanting to try for the longest time. The bunny sitting in the grass holding the decorated egg on top of the box is actually a modified version of a "Card in a box" style card. 

I started by making  a template for a simple box large enough to hold my cookies (4-1/2 x 5" with a depth of 2"). I then sized the Easter Bunny Box Card svg cutting file from My Scrap Chick to fit the top of my box. At the same time I decreased the height of the card base to one inch and decreased the height of the struts inside the box card by an additional 1/4" so that it would sit securely on top of the box. I also changed the bunny on my box topper to a bent eared one which I picked up from the Lori Whitlock Shop.

Here's the box of cookies with the box card topper removed. I was pretty happy that this turned out just as I hoped and imagined it would. There are so many creative and clever svg cutting file designs for box style cards available online and I think this idea of using them as box toppers makes for a fun way to decorate treat boxes.


Sunday, March 26, 2023

Sliceform Pop Up Birthday Card

 Today I'm sharing a birthday card and gift card holder that have fun new (for me) pop up mechanisms.
 
I kept the front of the card very simple, using mostly metal dies and punches. I used Craft Emporium's Balloons Galore dies for the stitched balloons, and paper punched stars from glitter cardstock. I also used a "Celebrate" word die from MFT and created a shadow for it in Make the Cut Design Studio.

Then on the inside...this super fun sliceform style birthday teddy bear pop up! I think I mentioned before how sliceform cards always intrigue me. So when Lori Whitlock came up with her collection of cute sliceform cards, I was over the moon!

Although the design of this sliceform style is very simple and basic, for me it provides a perfect starting point where I can play and experiment with new creative ideas. The neat thing about many of Lori Whitlock's sliceform cards is that they utilize the same sliceform base and you can interchange the decorations and embellishments on them to suit the occasion of the card you want to create.

For my card I chose to mix and match decorative elements from two different files, "Valentine Bear" and "Birthday Presents". Installing the sliceform base was a little fiddly at first but it doesn't take long to get the hang of it. 

I used Whimsy Stamp's "Birthday Word and Shadow" Set and Hello Bluebird's "Happy Birthday Words" dies together with the balloons on the inside of the card.

It was lots of fun trying this new style of pop up card for the first time. I'm looking forward to trying out different design elements on this base to come up with cards with varied themes.


I also made this matching gift card holder to go with the birthday card. This little box with sliding drawer was constructed from cardstock cut with Karen Burniston's "Slider Box Die". It's just the right size to hold a gift card, which pops up as the drawer slides open. The little box  you see right behind the gift card in the third photo is a rubber band activated "Bam Box"  which causes the gift card to pop up. This little "Bam Box" is also constructed from Karen Burniston dies and can be used to pop up all sorts of panels or embellishments in almost any card. I can hardly wait to use this little "Bam Box" to add pop up animation to my cards.

Tuesday, March 21, 2023

Popping Flap Birthday Gift Card Holder

Here's a Popping Flap style gift card holder I sent to a dear friend for her birthday. 

The Popping Flap card is a fun interactive pop up card that comes together fairly quickly and a favorite to make, especially when I'm running late and need to send a gift and card ASAP.

Since my sweet friend is a big fan of Hello Kitty, I searched in my collection of Hello Kitty coloring books and found this image to convert into a cutting file. I used Taylored Expressions' Sprinkles Confetti die for the cupcake sprinkles and Cuttlebug Wicker Weave embossing folder to add texture to the oval mat.

As the ribboned tab on the bottom of the card is pulled, a hidden card inside slides out and pops open.

For this card I created a very simple personalized sentiment to use as the pop up element. I used Arial and Ballerina fonts for the Happy Birthday message cut with glitter cardstock and added a shadow layer for the pop up. I then added a pocket to the bottom of the card for a place to add a gift card.  If you'd like to give this type of card a try, I followed a video tutorial on You Tube by Tamara of BeeHappiLea Craftin to learn this fun card style.