At our home, hubby's more of a Marvel Comics fan than a Disney fan so I knew his superhero card had to have either Captain America or Iron Man on it. And I guess that's the main reason it has taken me so long to even attempt this card.
I searched the internet for nearly two years, hoping to come across a good Iron Man cutting file, but no such luck. I found a coloring book image I liked, but the thought of having to edit and re-edit it to create a decent cutting file gave me a rash....sooo many tiny piecings involved! Sat down countless times during the past year to work on it but always got frustrated and gave up.
Well last month, I was nearly at wits end trying to come up with ideas for Fathers Day cards, and Tina's Mr. Incredible card kept popping into my mind. I knew then that I just HAD to finish that Iron Man cutting file. Many hours and late nights later it is finally finished.
Everything else about the card came together fairly easily. Found lots of superhero bubbles on the internet which were simple to convert into cutting files in Make the Cut for the flaps of the card. I used Comic Sans and BaDaBang fonts to create cutfiles to customize some of the bubbles. Many superhero building borders on the internet too so that wasn't too hard to render into a cutfile.
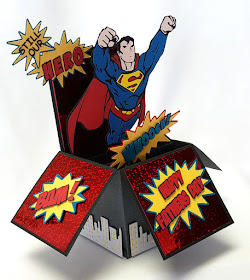
Next, a card for my dad. Not sure if he's much of a Marvel Comics fan...always thought of him more as a DC Comics person so I chose to use Superman for his box card.
Happily, I already had cutting file for Superman in my files so dad's card came together really quickly.
I'm sure everyone already knows what a Card In A Box looks like folded flat...
It's kind of a cool thing how these cards open up into a box. About a year ago I saw a short video shared by Steven Franco on SVG Cuts Facebook page on how to make this card even cooler... of course I had to give it try!
Steven made a tool box shaped Card In A Box for his dad and showed how he added elastic thread to the bottom of his card. The elastic thread needs to run diagonally across inside the bottom of the box. The length of the elastic should be the same as the distance inside the box from corner to corner (when the box is open). I wish I knew a way to share his video here, but since I'm not very tech savvy, the best I can do is share my poor quality phone video...
I think you get the idea... Anyways, I think it's pretty neat how the elastic added to the bottom will allow the card to POP open as you open the envelope. Hopefully dad and hubby will think it's cool too!


Holy cow Eunice, you sure knocked this out of the park. What an awesome card packed with "pow", "wow", and "zap." Your card and sweet sentiment will make your hubby sure feel like a hero.
ReplyDeleteOh my goodness!!! These are FABULOUS!!! I am tickled pink that I was able to offer YOU inspiration! You are one of the most talented and inspiring cardmakers out there and I LOVE every single thing you make. These turned out absolutely amazing and I love everything about them. Hope you have a wonderful day Eunice!!!!
ReplyDelete