Sunday, May 31, 2009

Anya Birthday


I made birthday cards with my last Miss Anya stamp from the set I got from The Greeting Farm earlier this year. Love how she looks so chic in her boots! This first card went to my friend Jen from Pieces of Me, my very first blogging friend, who continously inspires me on a daily basis. She is incredibly talented and creative, always fun, and one the warmest, sharing people I have ever met.

For Jen's card, I used printed cardstock is from a DCWV Spring Glitter stack, copics and prismacolor markers for coloring, and a round scallop punch from Stampin' Up. The flower is one of the layers of petals from a silk flower I pulled apart, round birthday stamped image comes from a set of clear birthday stamps I won as a rak from Teri's blog, and mini flower rhinestone bling (on the cupcake) is from Photocraft.


This second card was for my niece's 15th birthday. I thought Miss Anya would be appropriate for her card because I just recently began noticing how much she has really begun blossoming from her "cute kid" looks and into a very pretty teenager.

For her card, I used white cardstock in a Cuttlebug birthday embossing folder which I brayered with pink ink from a Tsukineko Brilliance pad before running it through my Big Shot machine. First time for me using this technique, and I was pretty pleased with how it came out.

Printed cardstock is from another DCWV spring stack, pink dewdrops from Robin's Nest, vellum tag from Making Memories, flower is from All Natural Accents, and ribbon is from Maya Road.
For her gifts, I used a large gift bag, decorated with all three of the Miss Anyas in the set. Stamped & colored them with copics, then scanned, enlarged and printed them onto glossy photo paper. Can't get over how much I love this Miss Anya set!

Monday, May 25, 2009

One Card Swap for May


I was thrilled to receive this delightful card in the mail last week from Joni, my partner for Teri's
One Card Swap for the month of May. Just love how she made this double slider card...I know these take an extra bit of time and effort to make, especially to get the slider to work just right...and Joni's card turned out great! Fairy Tink looks adorable in pink (yup Joni, PINK is my fave!) and Joni says she used a Sakura Gelly Roll - Clear Star on her wings to give them that very special pearly sheen. So pretty! Everything about this card, down to the last detail, the heat embossing, the sentiments, the perfectly coordinated papers ... everything is so special. Thank you, Joni!


This is the card I sent to Joni. I came across this flower pot card as a challenge at Splitcoast Stampers and wanted to try one too. Of course I had to use my Cricut, right?
Found the perfect flower pot cut on the Walk In My Garden cartridge, sized it and welded two of them together in Design Studio. Then on a new page, I welded together three shadows of a flower cut I liked from the same cart, together with a rectangle cut from George. By using the preview of the flowerpot from the first page as a guide on the new page, I could size the flower shadows and rectangle for a perfect fit into the pot. I then sized and cut flowers to fit the shadows, and added a few leaves.
For the final touches, I chalked the pot & flowers, embossed the pot with a Sizzix embossing folder from a Hello Kitty set, glittered the flower centers, and added a tag and bow. It actually came together pretty quickly and easily, and that's a good thing since I had waited till the last minute to start working on my card for this month's swap. The actual card turned out to be larger than I had planned, about 8 inches tall! Next time I'll have to scale it down a bit.

Luckily, Fairy Ava is a digital stamp so I was able to size her to fit the card. I used Copics to color her in and blinged her wings with some prisma glitter. Isn't she the cutest? Love her anime eyes! Jodi from Inked Inspirations turned me on to the In Style Stamps site where I found Fairy Ava and many of her anime friends available in rubber as well as digital downloads.


The non-Cricut tutorial for this Flower Pot Pocket Card can be found on Stephanie Luman's blog, Beat of My Drum. You can also view many samples of what others have done with this card on the Splitcoast Stampers gallery. So many great ideas!

Monday, May 18, 2009

Feelin' the Love. . .

There's nothing better than being reminded by those who mean the most in your life of how much they love you too. Dd sent me my very first Edible Arrangement for Mothers Day this year . . . SWEET! It was a stunning bouquet of fruit...chocolate dipped strawberries and apples, melons, flower shaped pineapples, and grapes all beautifully arranged in a glass vase delivered to my workplace with a mylar balloon. What a wonderful surprise! And . . . it was absolutely DELISH! I sampled at least one or two of each fruit, and every one was sweet and juicy. Sorry for the bad photo, but I had already started sharing it with my friends at work when I remembered I could take a picture of it with my phone.


Here's a photo from the Edible Arrangements website of what it looked like before we started eating it! Almost too pretty to eat!


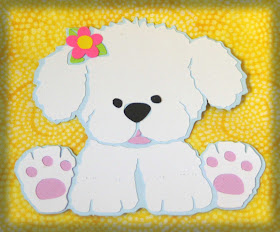
And from my loving dh . . . he installed brand new lighting fixtures in the dressing area of our master bath, AND . . . a download from Sure Cuts A Lot! Haven't had the time to really sit down and play with it enough yet, but thanks to several wonderful tutorials shared by my hero, Susan Bluerobot on her blog I got a quick start and am on my way to learning more. This cute little doggie was my very first completed project using the Sure Cuts A Lot (SCAL) program and Inkscape. As you can see, it still needs a bit more "cleaning up" but I couldn't wait to do a first cut to see how the program works. The doggie image comes from a clipart site called Graphic Garden, where you can find some of the cutest downloadable clipart and graphics, many of which are free. Hopefully I will find some time soon to practice and learn more.

Sunday, May 10, 2009

Love Blossoms for Mom

Happy Mothers Day! Here's the card I made up for the two most special ladies in our lives, my mom and mil. Of course it had be extra special to show how much we love them! I immediately knew that this was the card I wanted to do when Cricut message board member Carla Schenk shared her beautiful and ingenious pop up bouquet card on the Design Studio forum. Carla had seen this video tutorial on making a seven flower pop up card on the Wonder How To site and was inspired to create her own cut file in Design Studio for it.

Just check out this very cool surprise pop-up when the card is opened ...


The video tutorial at the Wonder How To site shows how to make this card without the use of any die cut machines. The tutorial goes pretty quickly so you'll probably need to pause it several times along the way to get all the steps, but it really isn't too hard and is definitely worth trying. You may also want to scale down the size of the flowers a bit because the resulting pop up is quite large. And if you like pop ups and paper engineering as much as I do, you'll be excited to find lots of other tutorials for some unique paper engineering projects on this site.

For my Mothers Day cards, I used the pop up bouquet Design Studio cutfile created and so generously shared by Carla on her blog, Scrapped Lives. Thank you, Carla! If you are interested in getting a copy of her amazing cutfile (created with the George cart), leave a message for Carla on her post and she will email you the cut file, as well as detailed step by step photo instructions on how to assemble the pop up.

In addition to the George cart to do the inside pop up bouquet, I also used Plantin Schoolbook (flowers on front), Dreams Come True (leaves), Beyond Birthdays ("mom" on front) and Home Accents (top notch frame). Here are the additonal deets: DCWV Sweet Glitter Stack (front & inside); Bazzill Bling ("mom"); Lasting Impressions Dot CS (flowers); BoBunny Double Dot CS (leaves); Pearlized Pink Text wt paper from Creations Unlimited (inside); and silk flowers, rhinestones (Doodlebug), Copics, & glitter glue to embellish flowers. Font is LamboHmk.
And for their Mothers Day gifts, I made these little purses...

I always have such a hard time deciding on what to get our moms for gifts on Mothers Day. Decided to take the easy way out this year with monetary gifts so they could spend it however they pleased. With the pop up cards I had created, there really wasn't anywhere to put the cash, so I made these handbags from the Tags, Bags, Boxes & More cart.

I chose a chocolate glittered cardstock from the DCWV Sweet stack for the front flap of the bag, added a grosgrain ribbon handle and rhinestone faux fastener. Magnetic strips were glued behind the front flap and to the inside front of the bag to keep it nicely closed. Thought it turned out looking pretty chic for a couple of fashionably mature ladies. Hope they like it!

Tuesday, May 5, 2009

Samurai Warrior Helmet & Flying Carp

Last year while searching for ideas for Boys Day cards, I came across several images of samurai warrior helmets called "kabuto" which are typically displayed to celebrate the occasion. At that time I was in too much of a hurry to work on a cutfile so instead, I ended up altering a cutfile of a fish to create a "koi nobori" or flying carp decoration for a Boys Day card for dd's bf last year. I came across those same helmet images again this year, and somehow they didn't seem quite as intimidating this time. I decided to give it a try on Design Studio. Using shapes from the George and Jasmine cartridges to create the cutfile, it surprisingly came together pretty quickly. Piecing it all together and adding the details, including making the cord out of dmc thread, is what took time. I used Bazzill Tuxedo Bling cardstock for the base and coordinating washi paper, metallic and currency gold cardstocks to embellish; a krylon gold leafing pen for the outline details and a small sakura punch for the helmet decoration. For the cording, I took a length of dmc embroidery thread, separated it into two lengths of four strands, then twisted and twisted and twisted (!) until it started looking like a cord. To finish, I tied a knot and separated the strands at the end to resemble a tassle. It was a lot of work, but I was really happy with how it turned out.


I came across the cutest decorated fish cookies while shopping at the mall for Boys Day goodies. Thought dd's bf might enjoy getting these, since I know he likes frosted animal cookies. I wanted to be sure they got to him in one piece so I made this giftbox and decorated the top with a pair of flying carp.


I used shapes from the George and Plantin Schoolbook cartridges to create this cutfile. The printed cardstock on the cover is from the new DCWV Glittered Spring Stack...I really liked how the design kind of reminded me of fish scales and thought it would be perfect for this project.

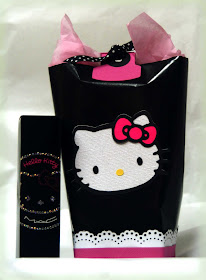
Although we continue to celebrate May 5th as Boys Day (Tango no Sekku), it is officially celebrated in Japan as Childrens Day (Kodomo no Hi). And of course, I couldn't send dd a care package without something special for HER too, right? This is the little Hello Kitty designer bag I made for dd to wrap up her surprise limited edition HK Mac lipgloss. (Who, in their right mind spends so much for lipgloss? I must be nuts!)

Cambria Turnbow has a great tutorial on her blog for the designer bag. I used black semigloss Hallmark wrapping paper for this bag and decorated with a cut from the Hello Kitty Greetings cartridge and a Martha Stewart eyelet lace scallop border punch. The tab closure at the top of the bag is a DS cutfile I made using the George cartridge. Very quick and easy!